Sewing a Dior Easter Dress
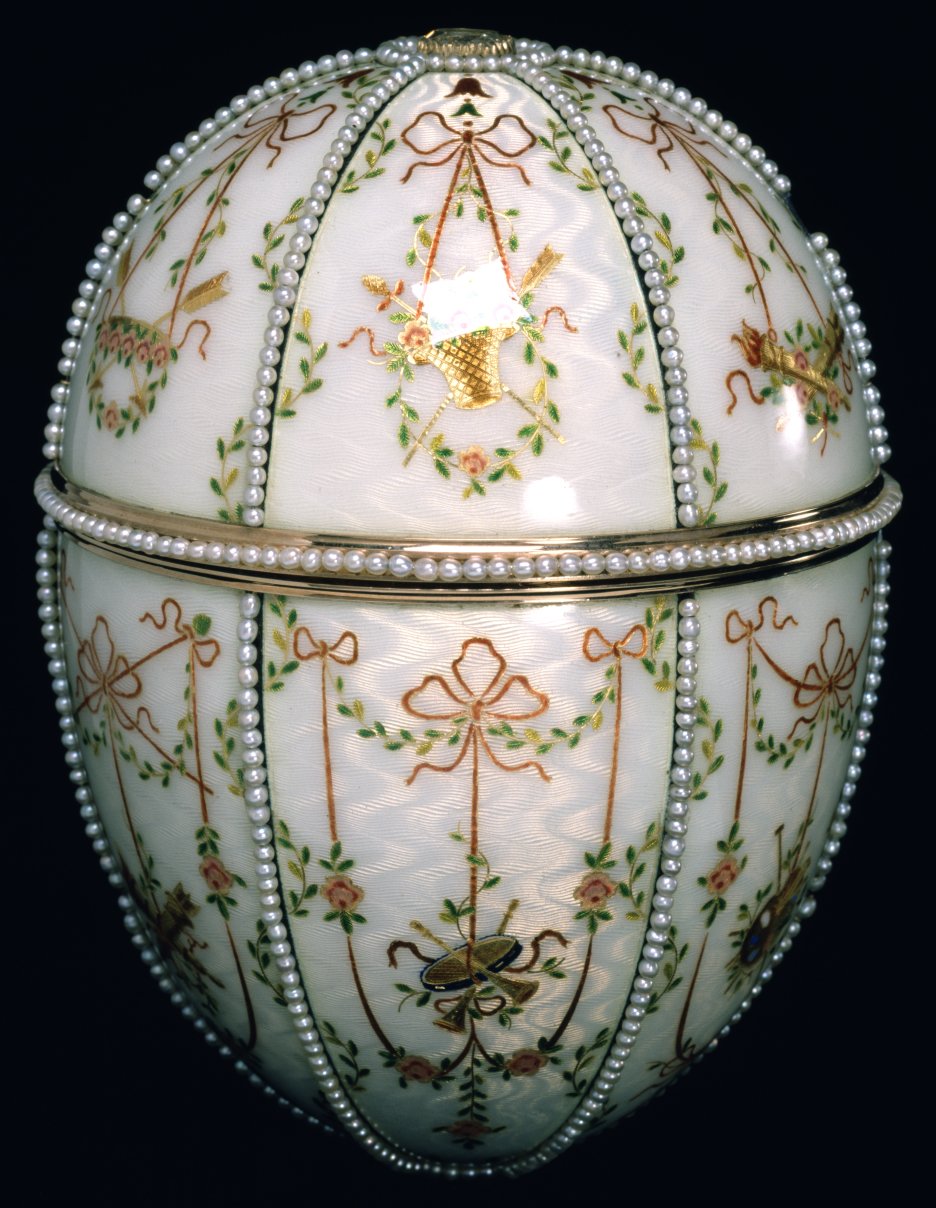
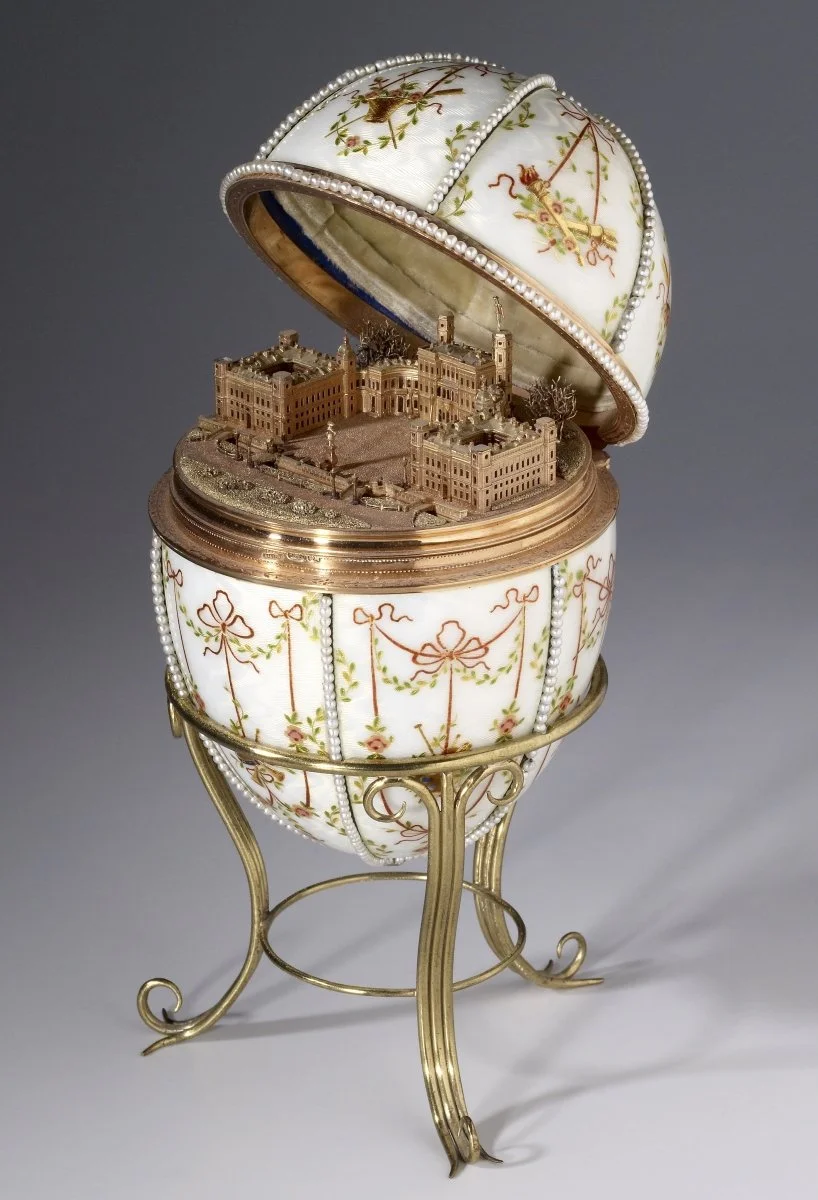
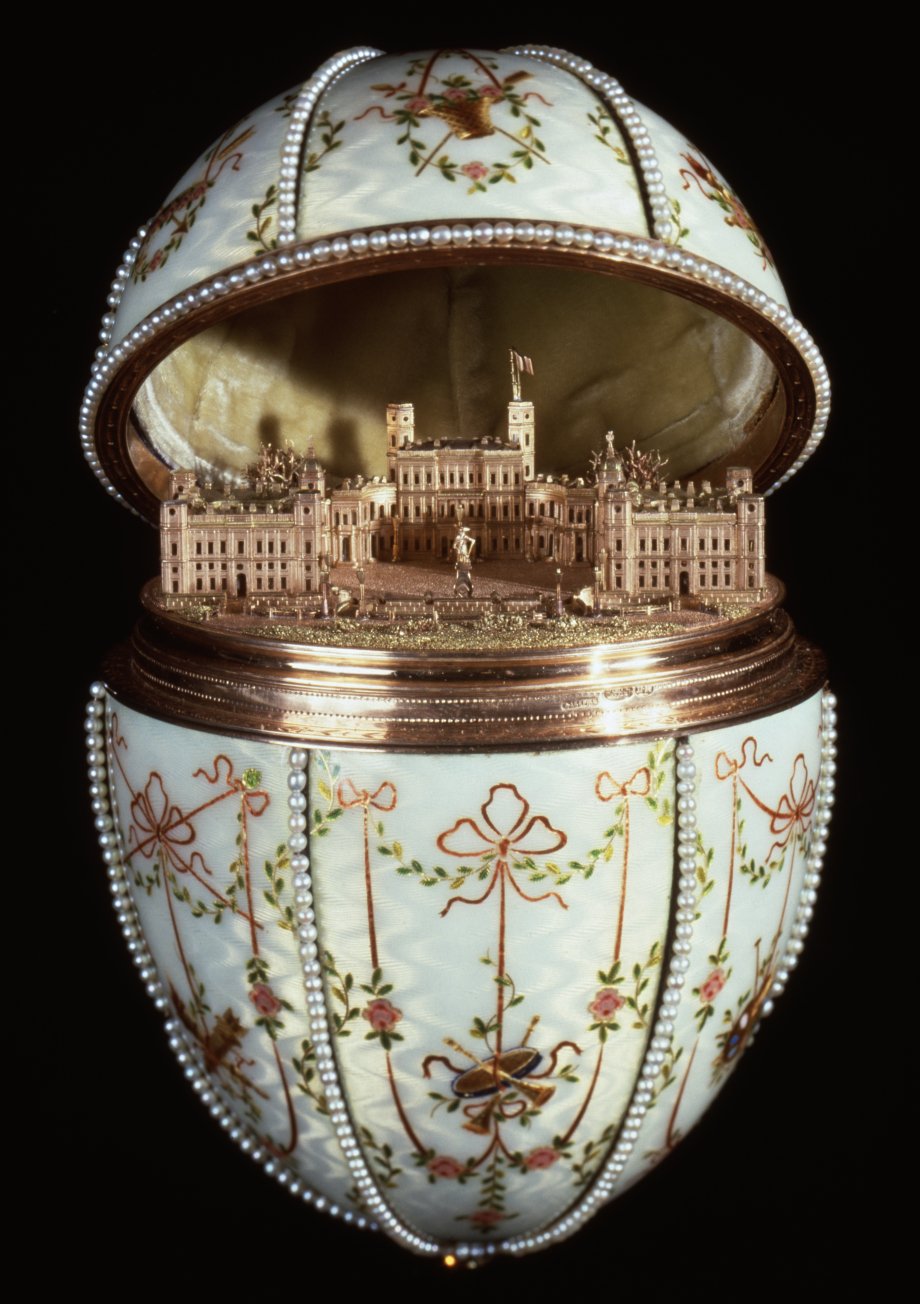
Happy belated Easter :) My favorite holiday.. True fans of the blog will remember last year’s Fabergé easter dress and this year I did the same thing. I’m going to claim this year’s egg as the Gatchina Palace Egg from 1901, even though really I made this dress based on the pattern and the fabric I wanted to use.
A few months ago I saw a post in a vintage sewing group I’m in on Facebook (lol) about a woman who made a dress for her sister’s wedding in the 70s. The pattern, Vogue 1553, is a Dior floor length gown with a hood. It’s from 1977. I would love to see the original of this but footage from 70s Dior runway shows is difficult to find. Maybe one day I will buy the Marc Bohan Dior book that Assouline published but it’s like $200. (Actually, I bought a Fabergé book recently, but it only encompasses the years 1903 to 1919, when Henrik Wigström (Finnish man!) was a master at the Fabergé workshop.)
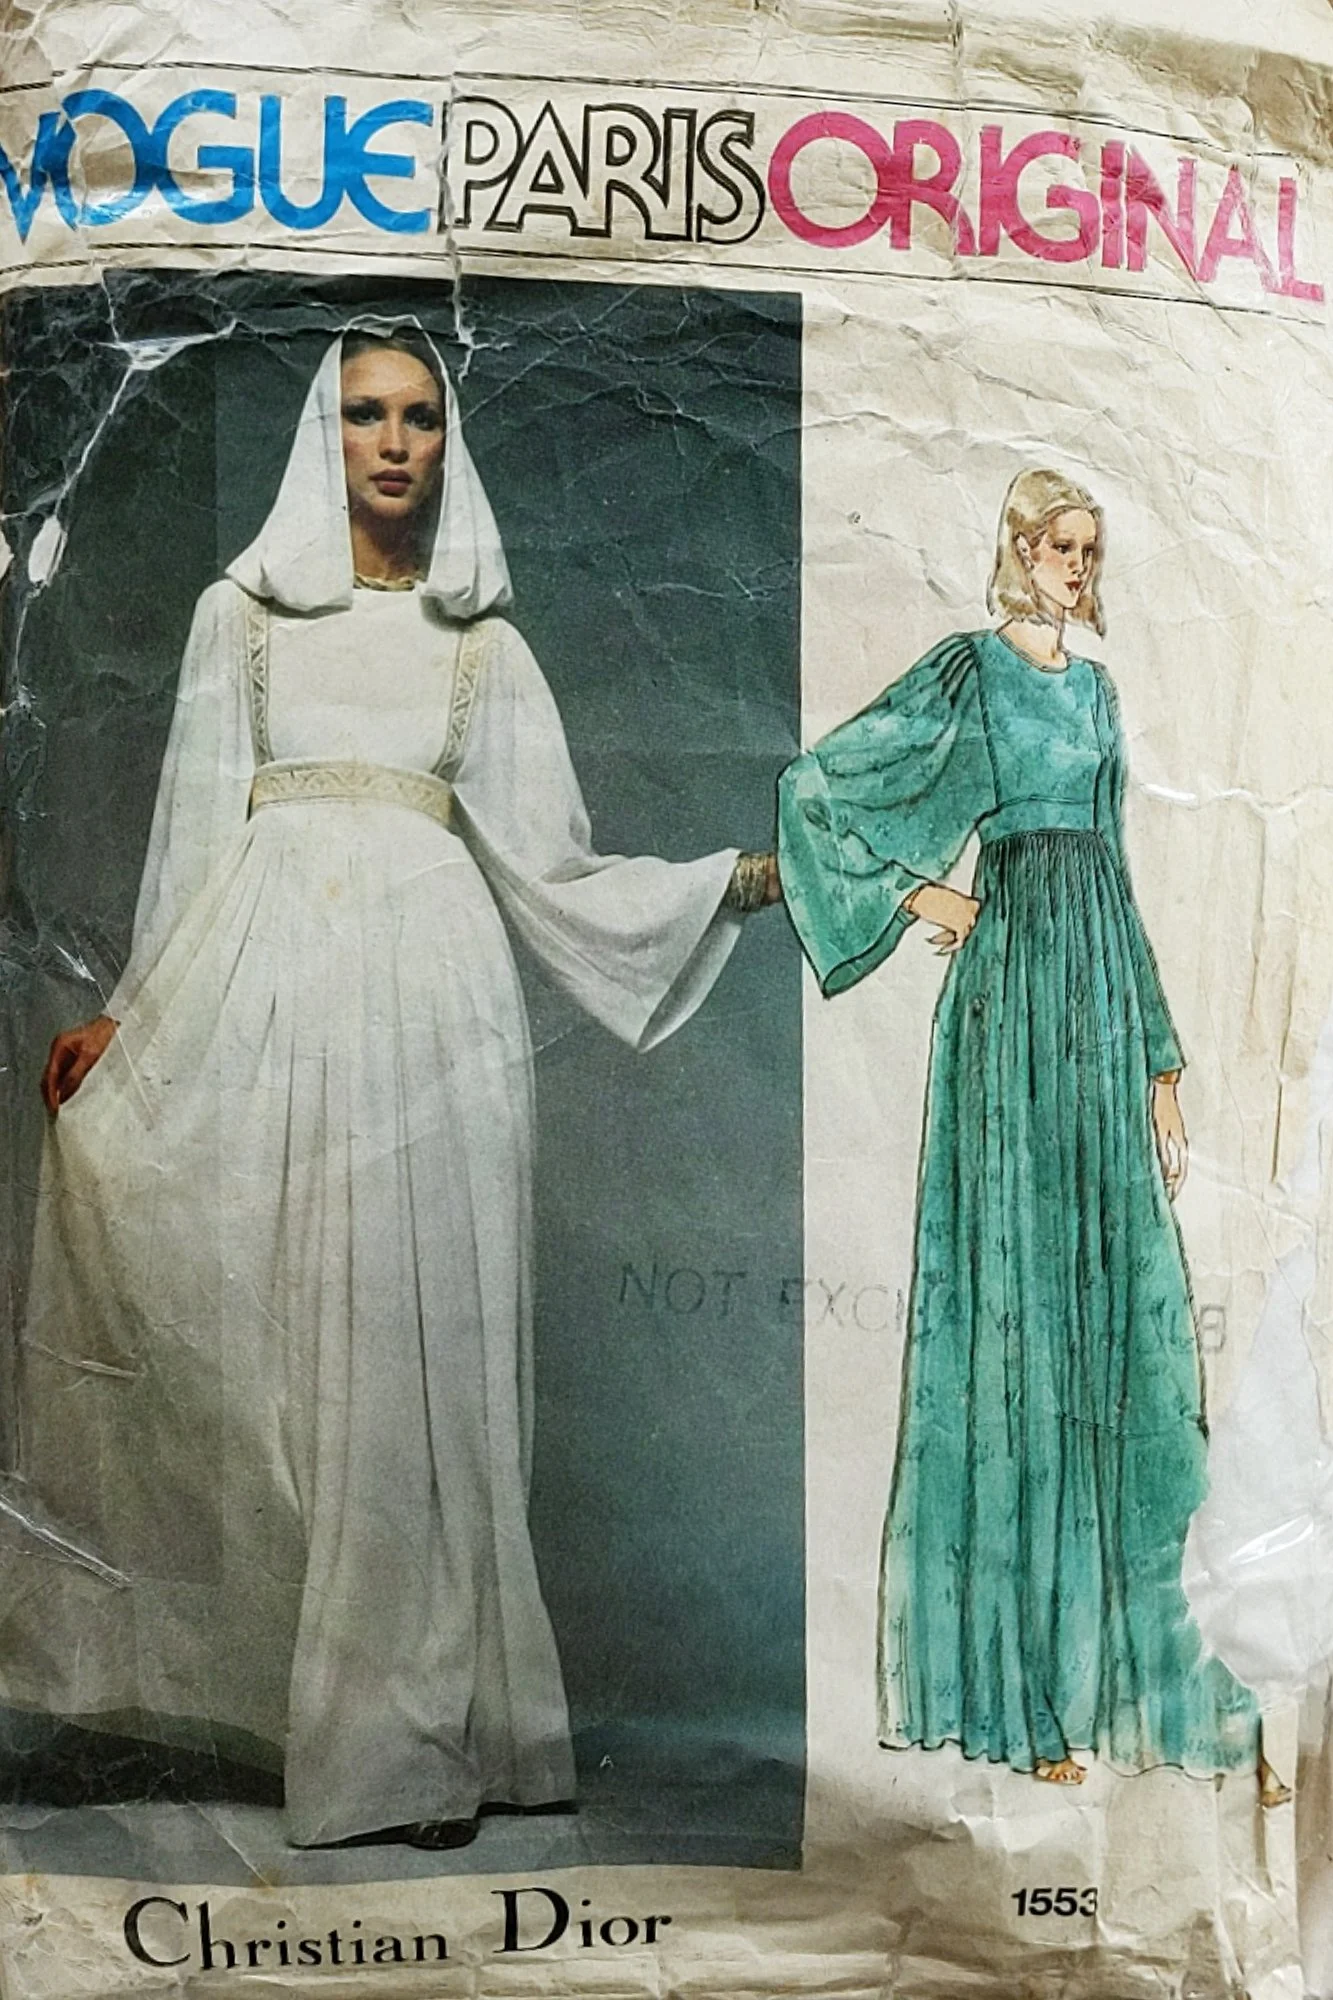
I bought this pattern from an eBay seller in New Zealand and when it arrived a month later I realized it was 2 sizes too big, and it was the Wednesday before my Easter party. I don’t really have the grading skill to grade down a kimono sleeve, high waist, slightly eased dress down because it doesn’t have any of the markers of typical grading (the waistband is not at the true waistline, the underarm seams are part of the sleeve not the bodice, it fits loosely) so I just decided to make it true to the pattern size and see what happened.
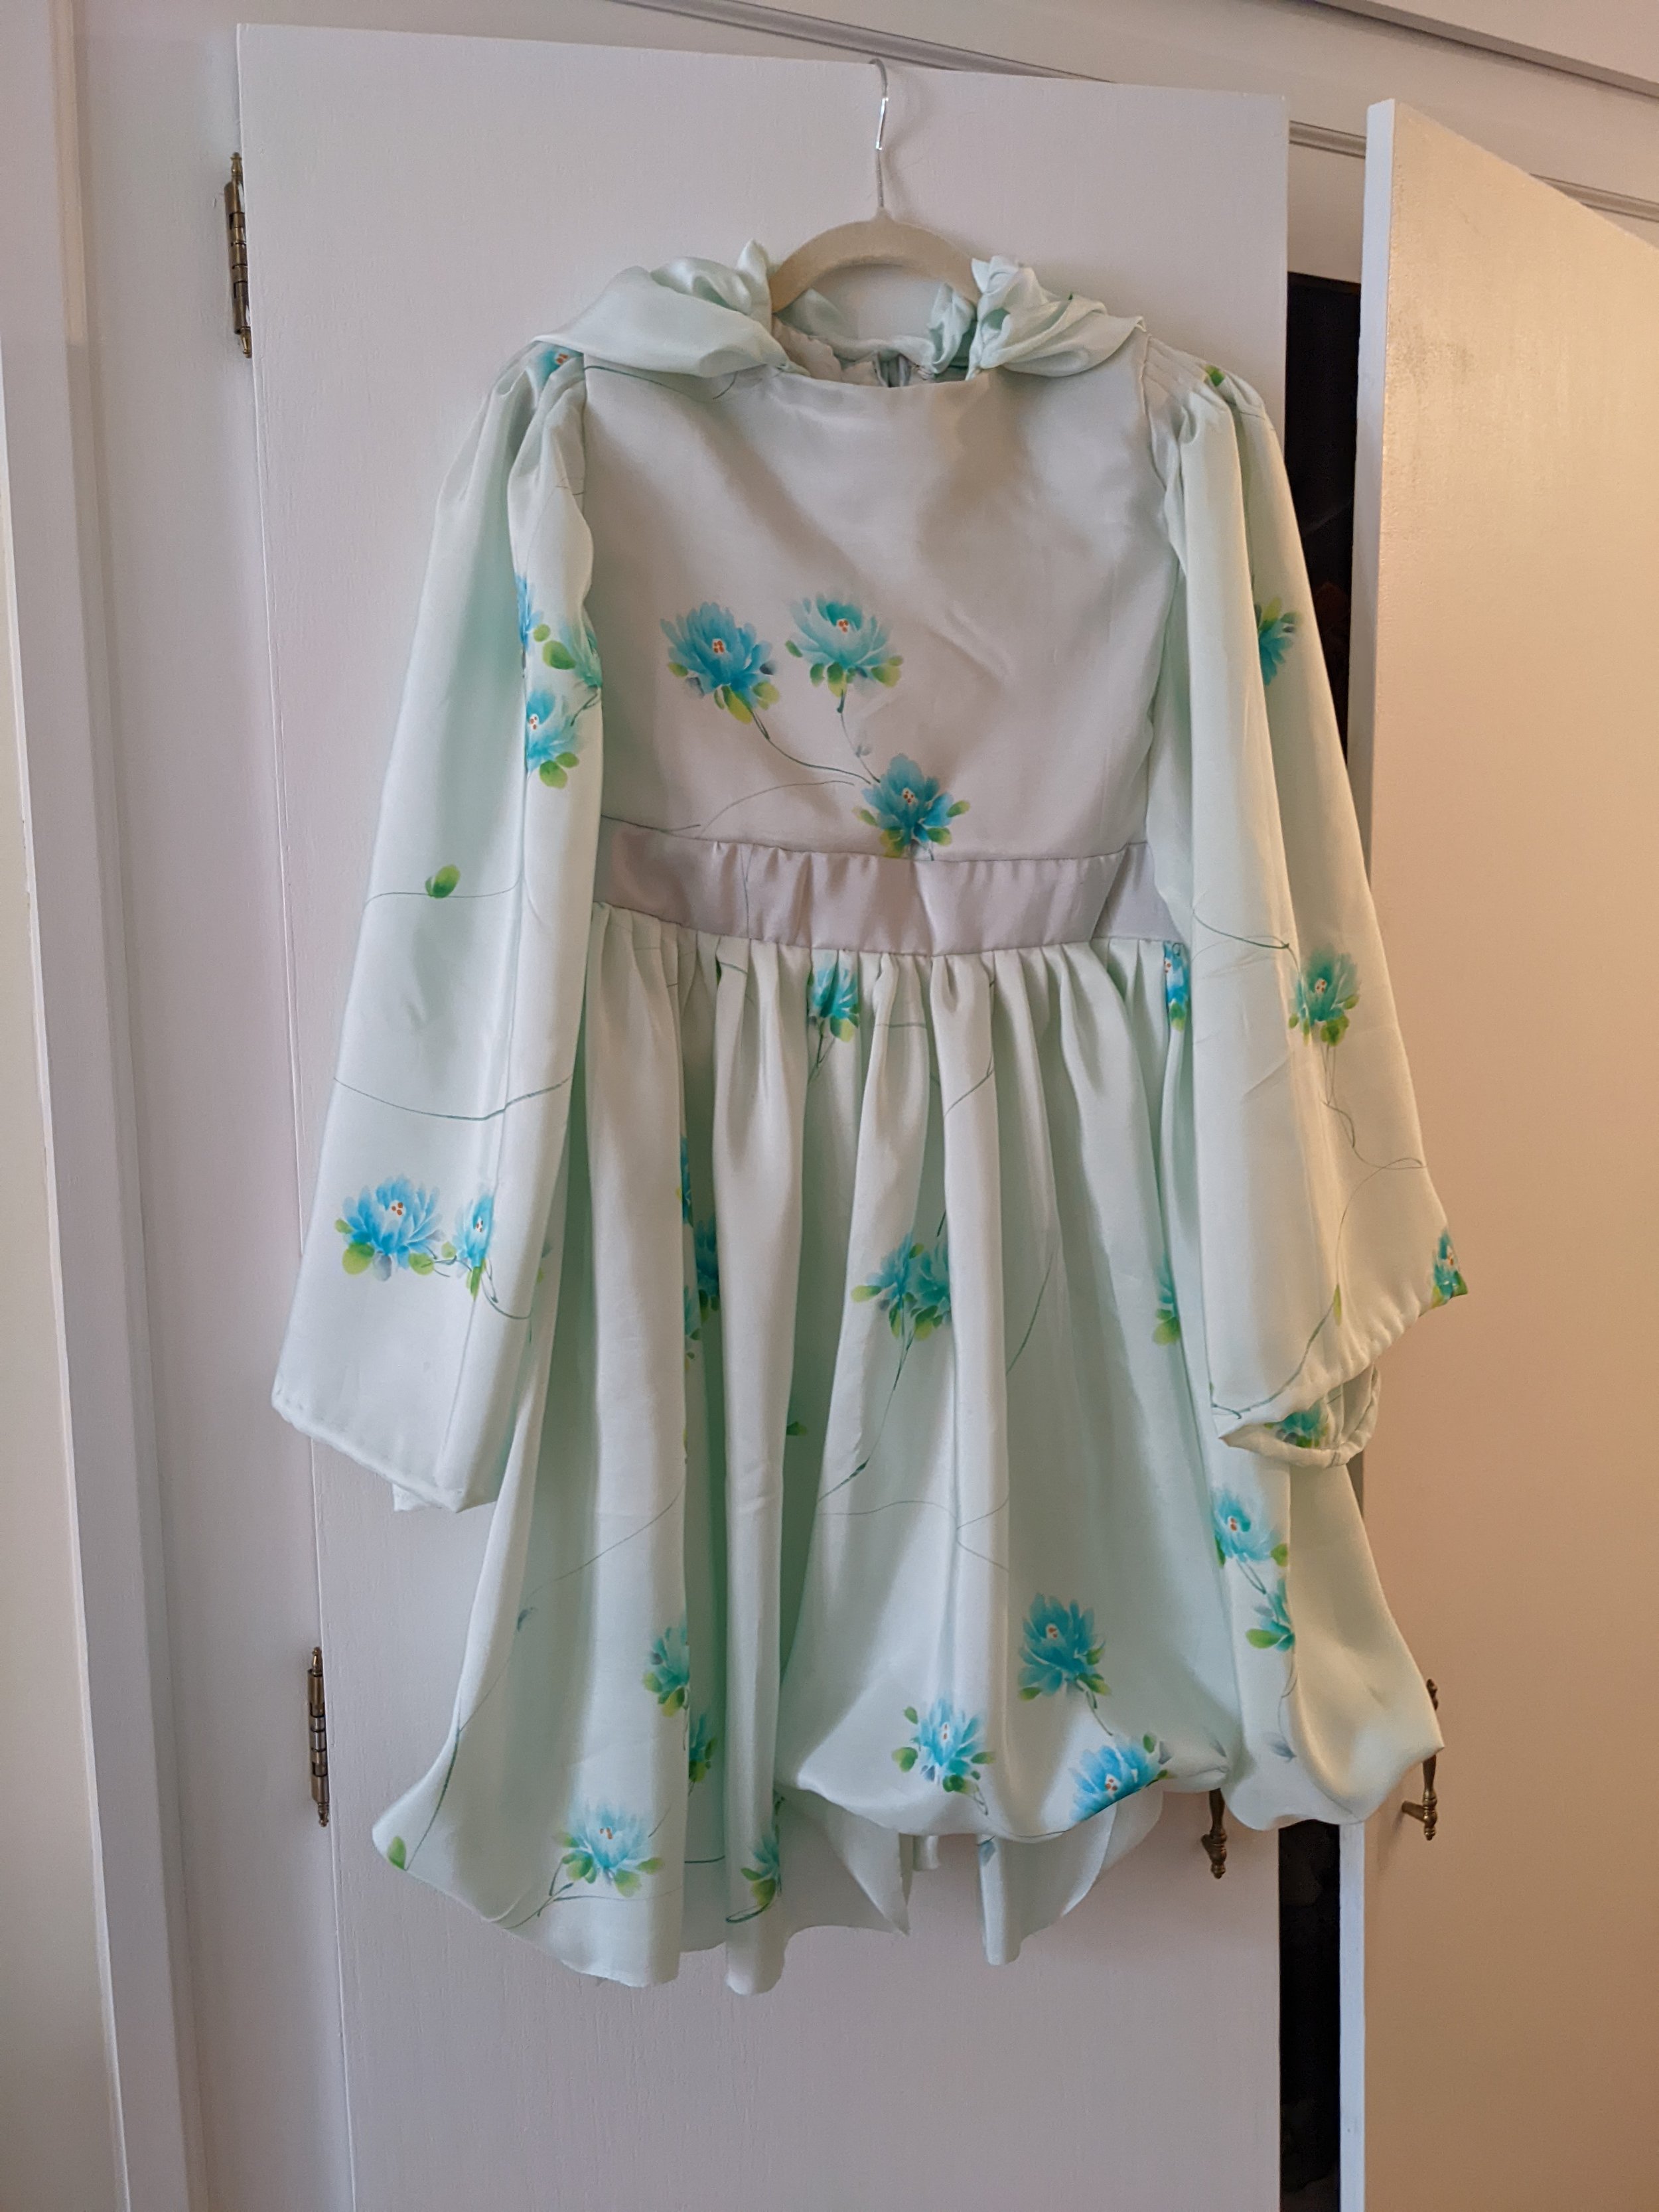
When my grandmother on my mom’s side, Inge, passed away last year my mom went to Finland to help sort out her belongings and she sent me a lot of her fabrics. My grandma would have clothing made for her by a tailor in the 60s and 70s in Finland and purchased fabric from around the world for this. The fabric I used is a hand painted silk from Korea. I had 4.5 yards of it but the pattern called for 7. I assumed most of the fabric required came from the huge sweep of the skirt so I decided to make this dress as a mini.

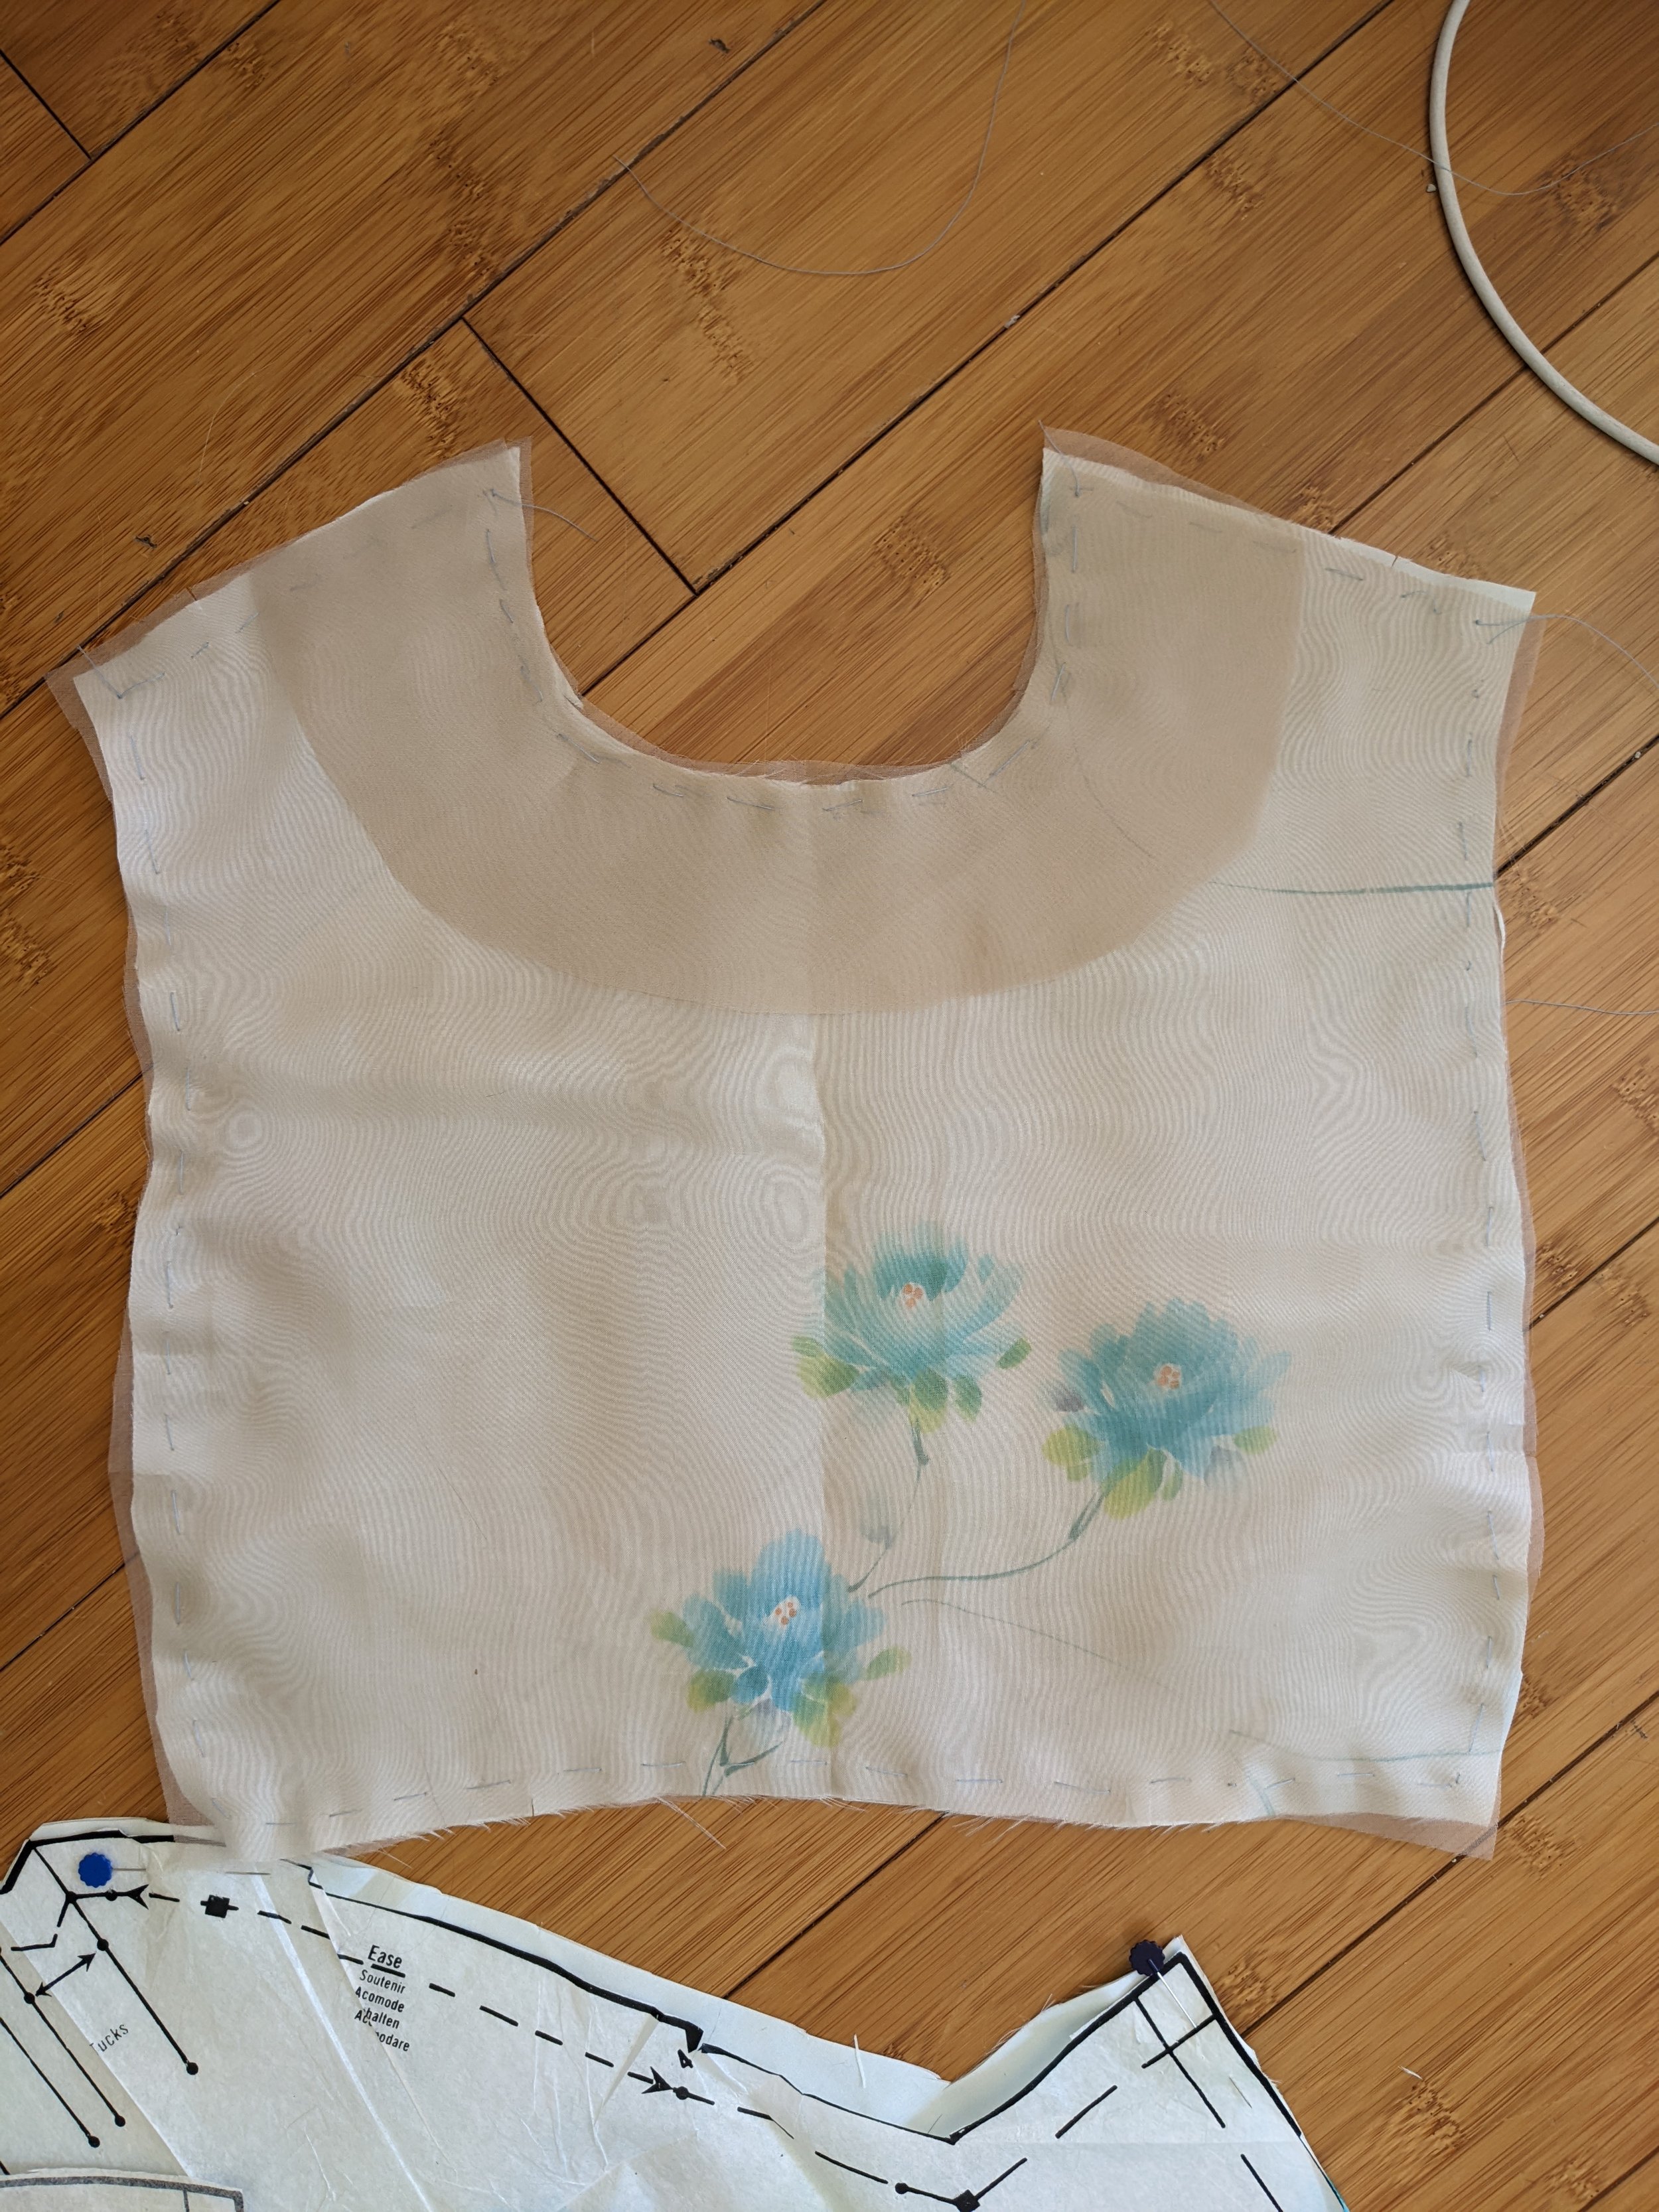
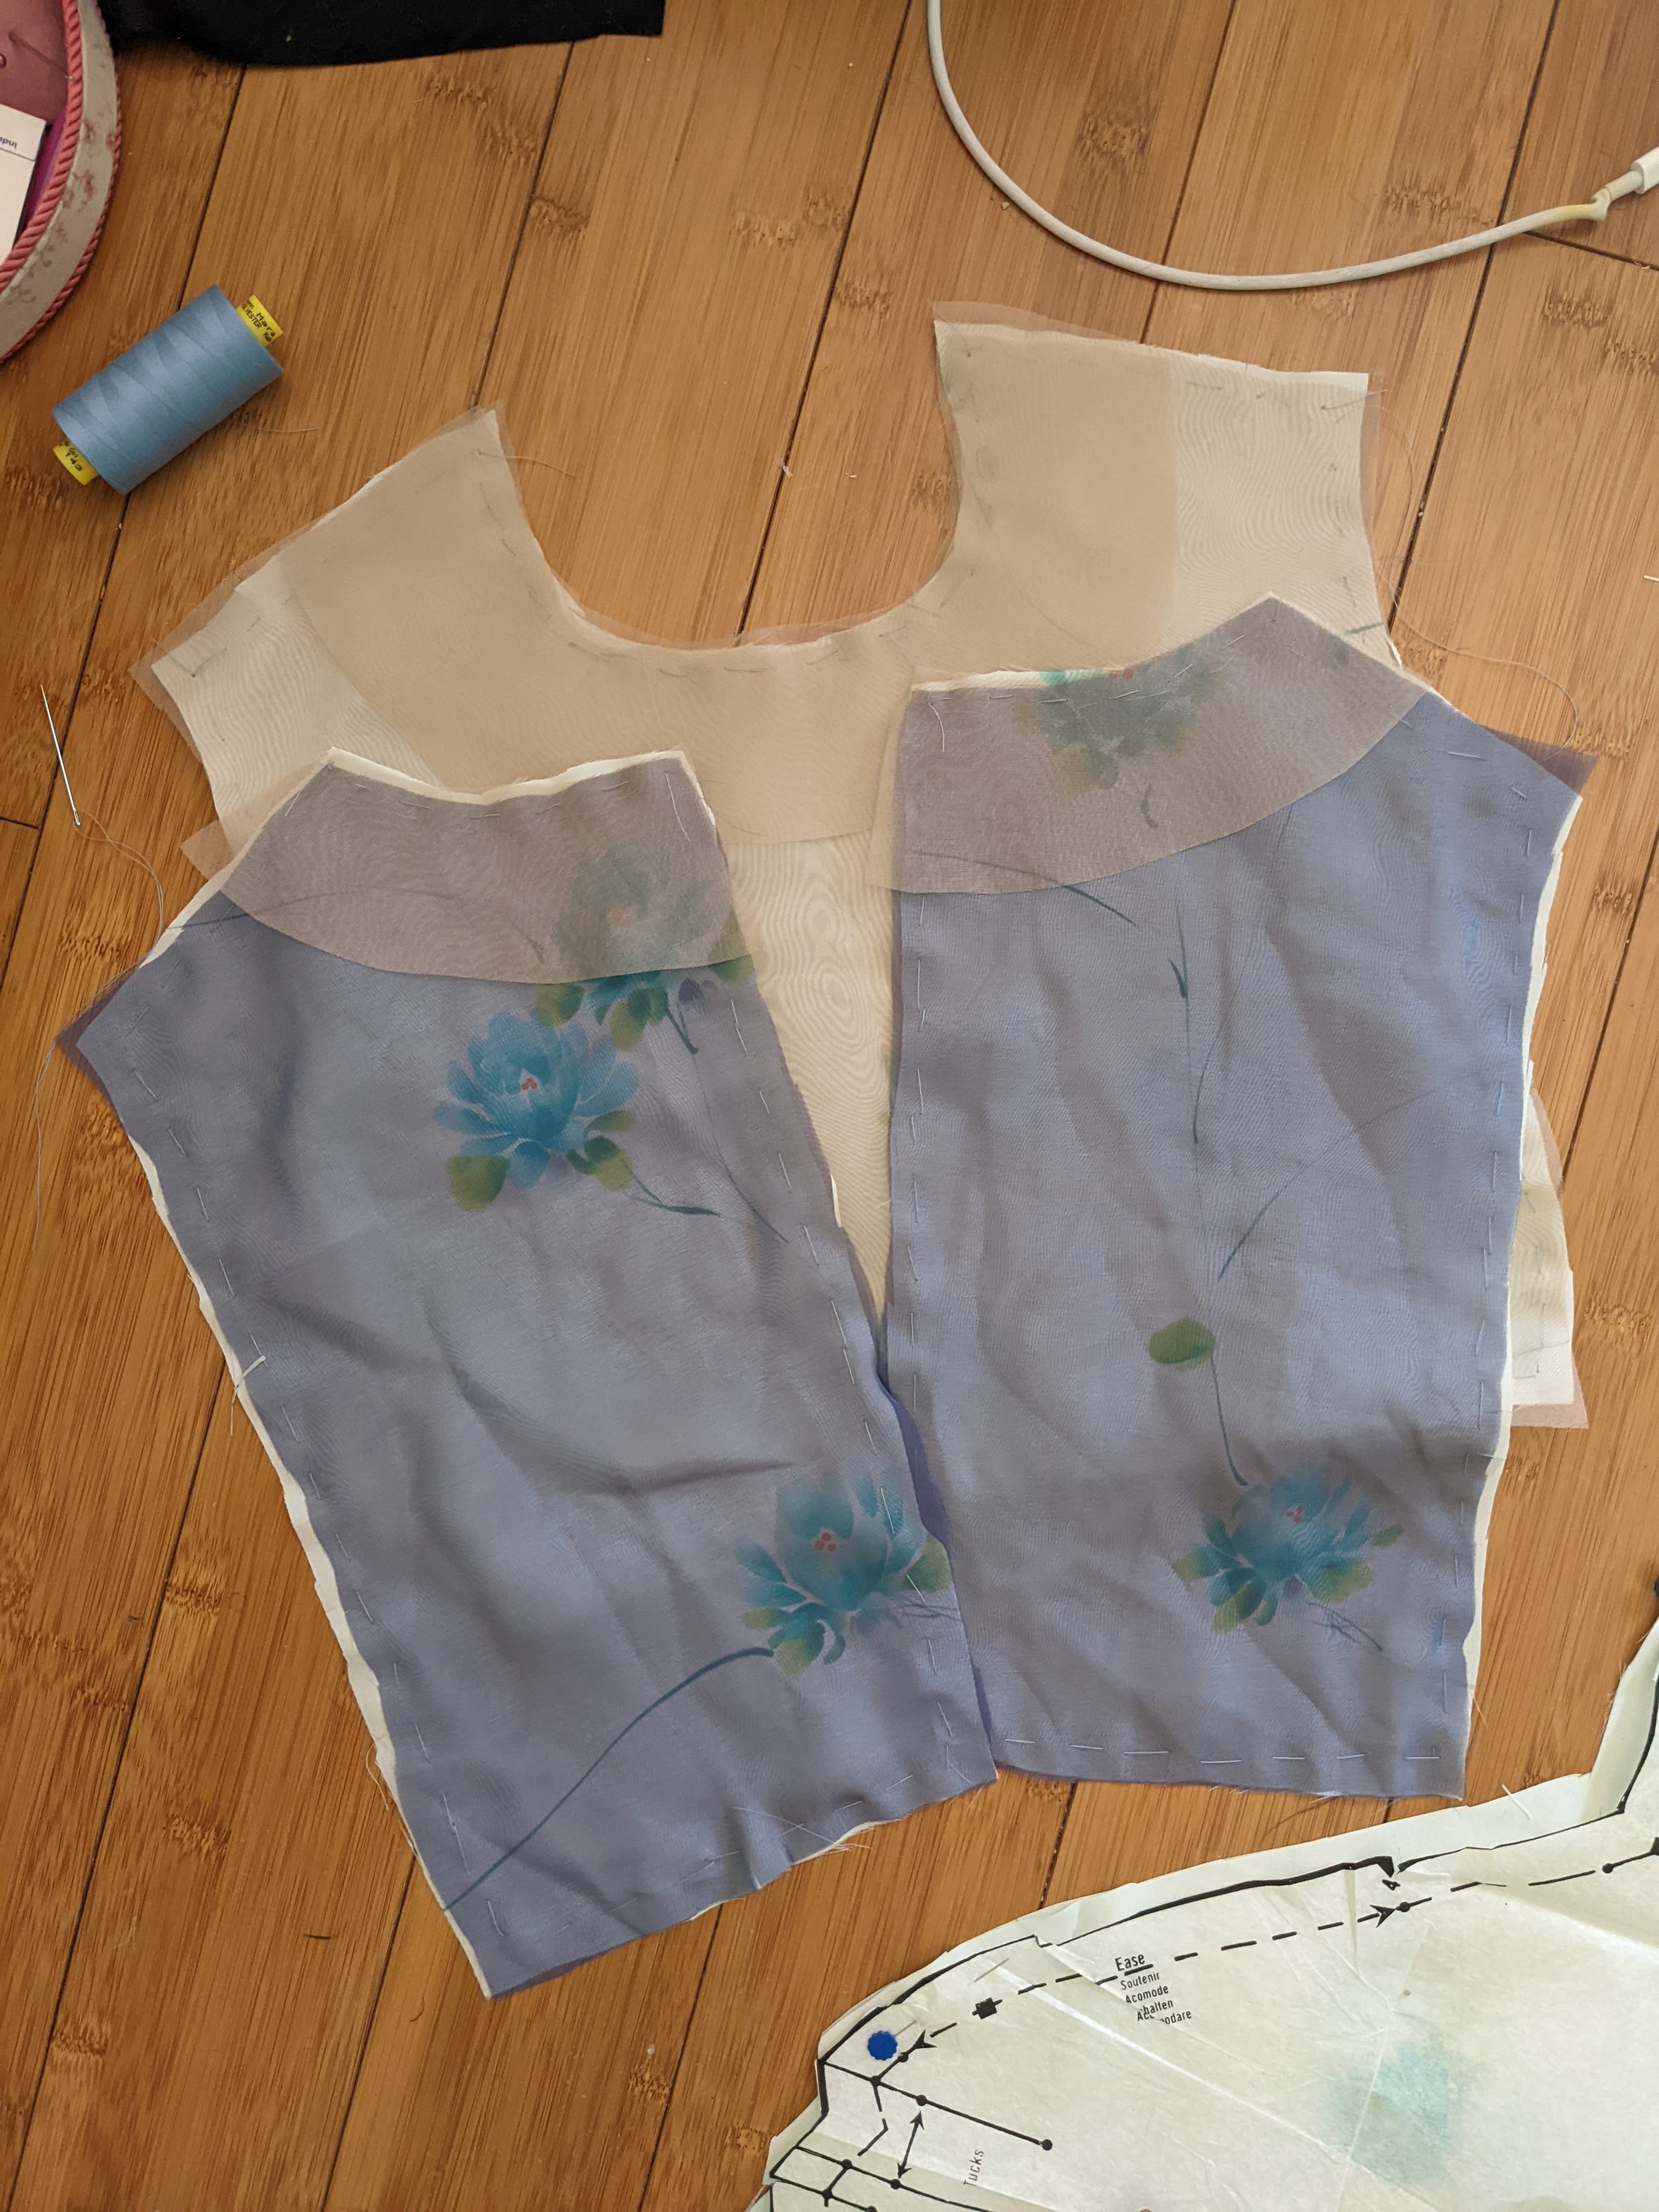
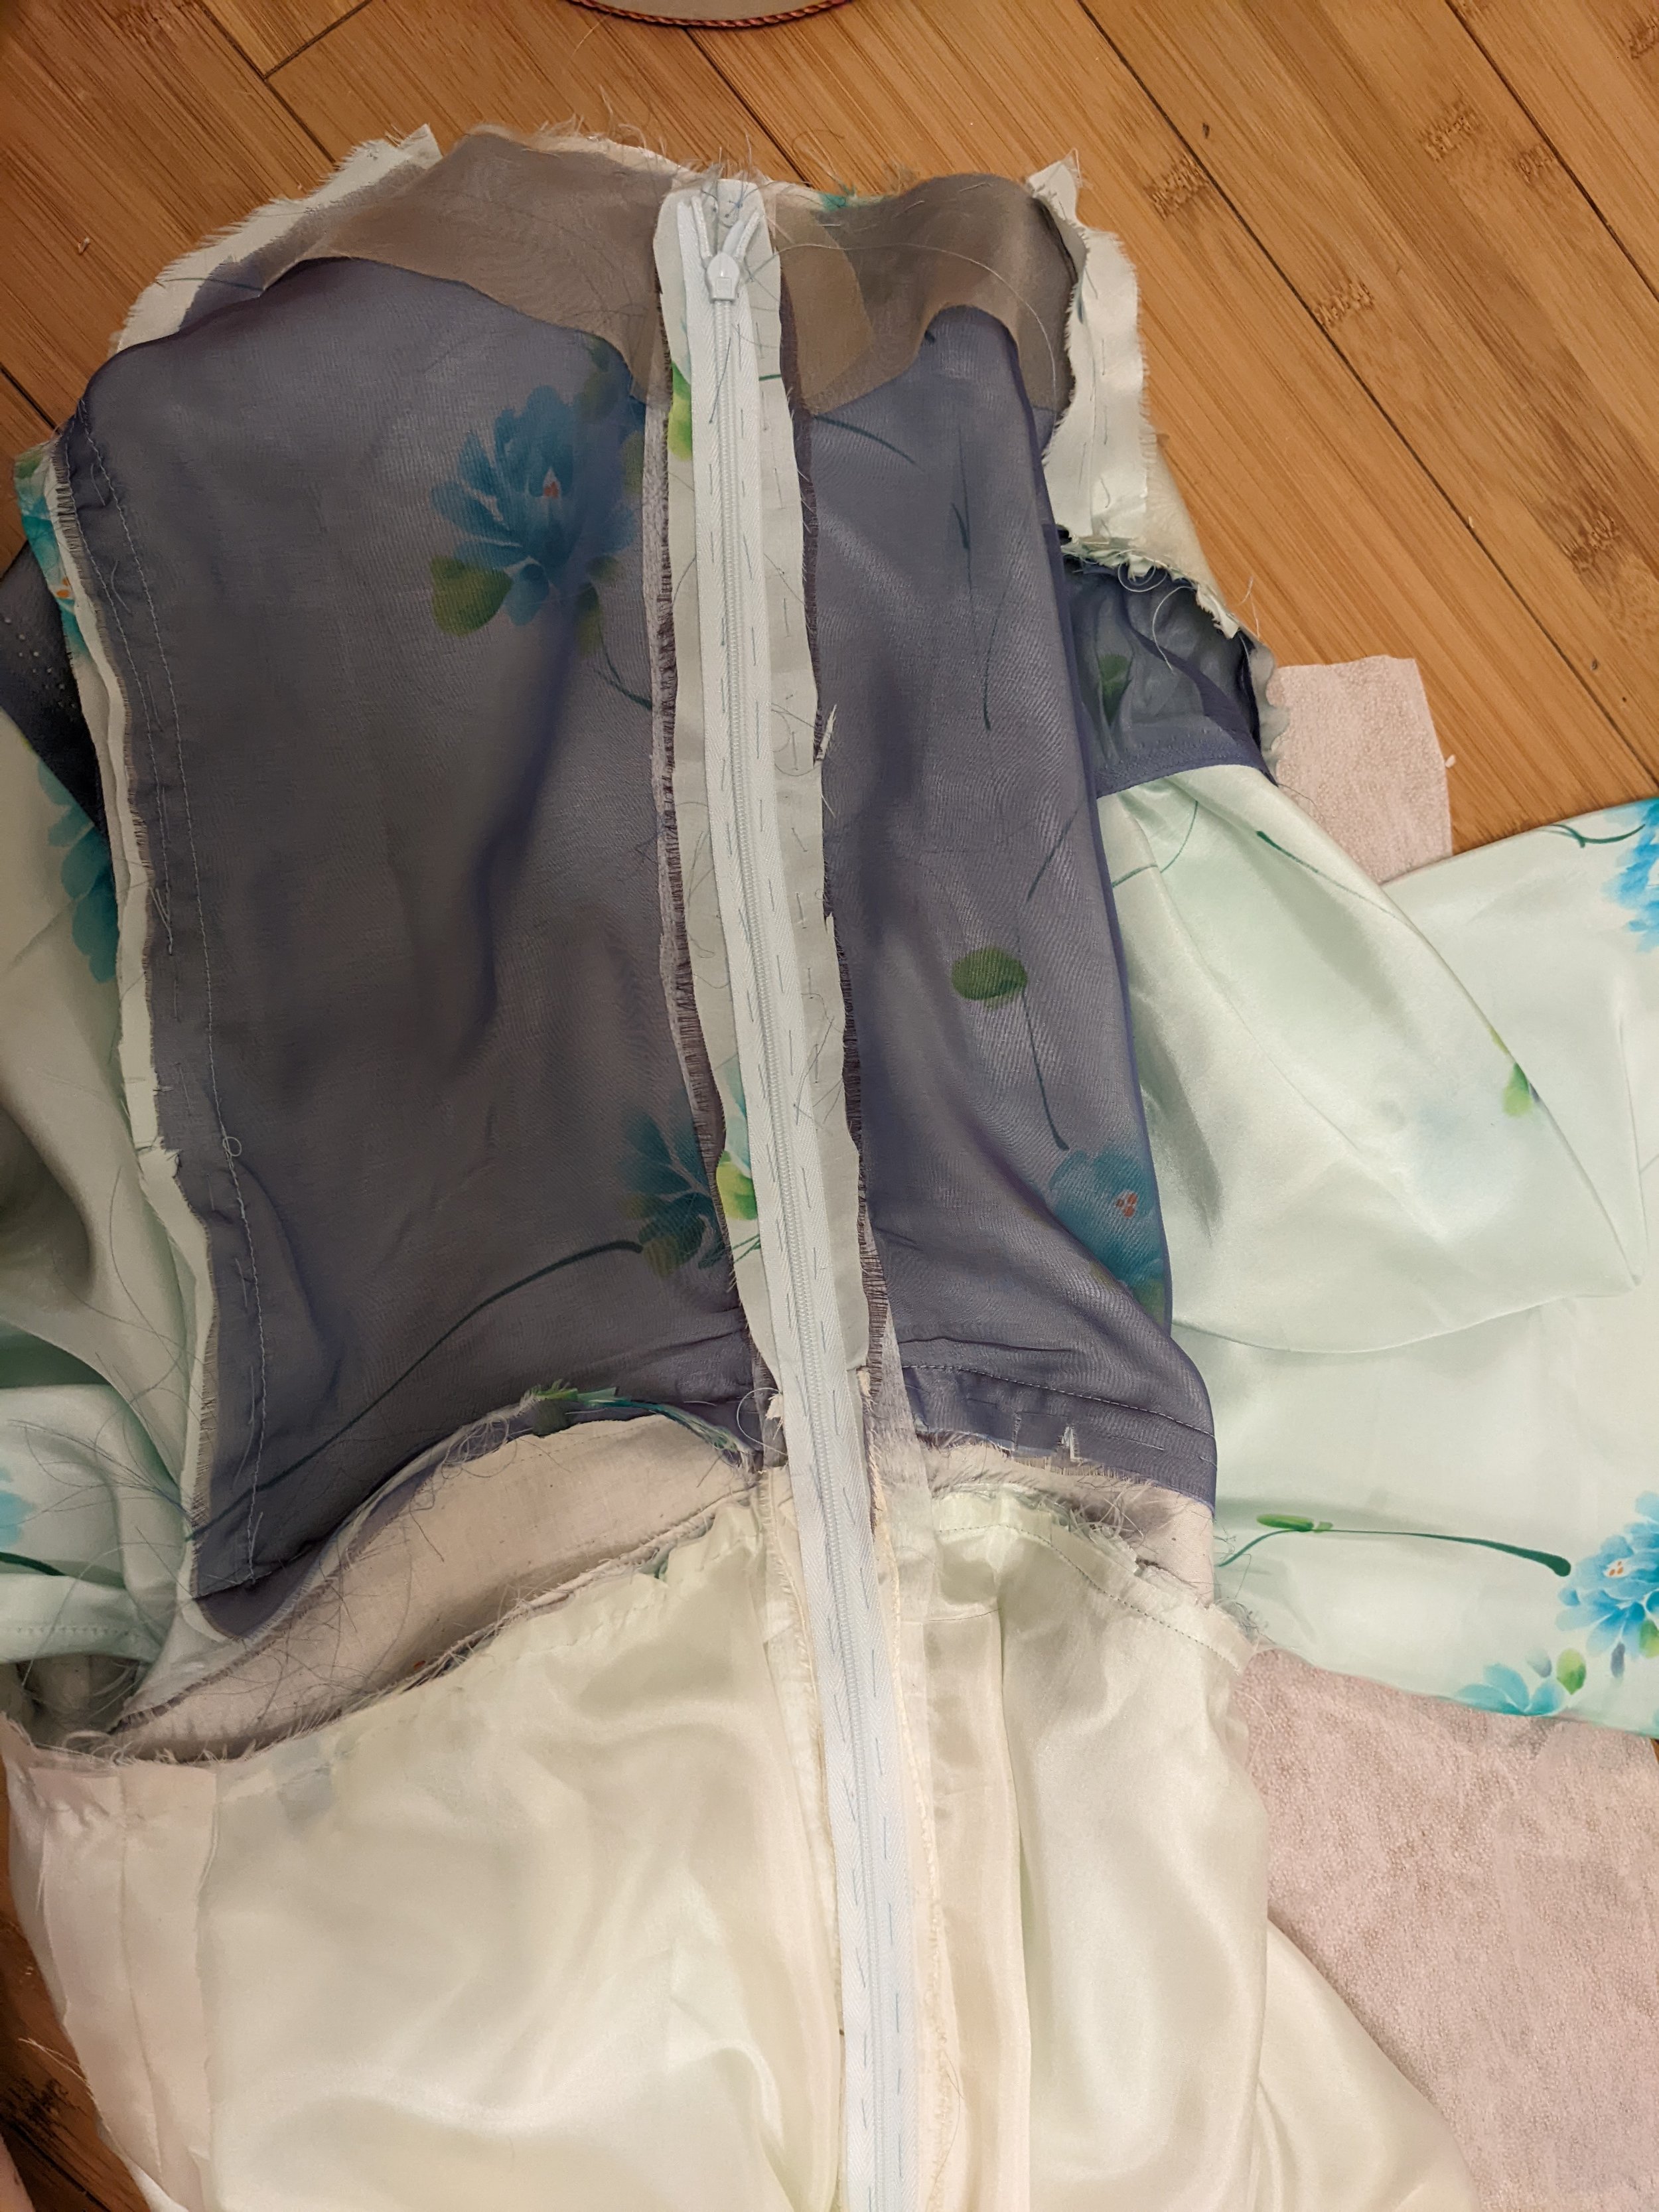
The pattern instructions call for a fair amount of hand sewing/hand basting, and especially a lot of underlining. Underlining, which is uncommon in my experience except in tailored outerwear, differs from interfacing because it provides a support for the fabric throughout the body of the garment: “An underlining gives inside support to seams, facings, and hems; it is typically concealed beneath a standard lining. Underlining helps give the garment a firm, sculptured look, adds strength and durability, and provides wrinkle resistance.” Meanwhile interfacing stabilizes necklines, collars, cuffs etc. (Here.) I used silk organza for both the under and interlining since the silk is so light and I didn’t want a super stiff neckline (as in muslin interfacing). Here’s my interfaced and underlined bodice, I ran out of the tan organza and had to switch to blue for the back and rest of garment.
Next I pleated the sleeves, then French seamed them (because this piece is lined except for sleeves, the pattern called for a French seam - I love when patterns include specific seam finishes).

This silk was really great to work with, so light and delicate. Next I underlined AND interfaced the belt, I don’t know why it calls for both in this case since the belt is all one piece but I did it. I used the blue organza and cotton muslin for interfacing to make sure the belt was stable.

Next up were sleeves and shoulder stays. The kimono-style sleeves create the side of the bodice (so the front and back bodice sections connect only at the shoulder seams. The shoulder stays were cool, I had never done that before. Keeps shoulders from drooping. Pic from after I attached the skirt.
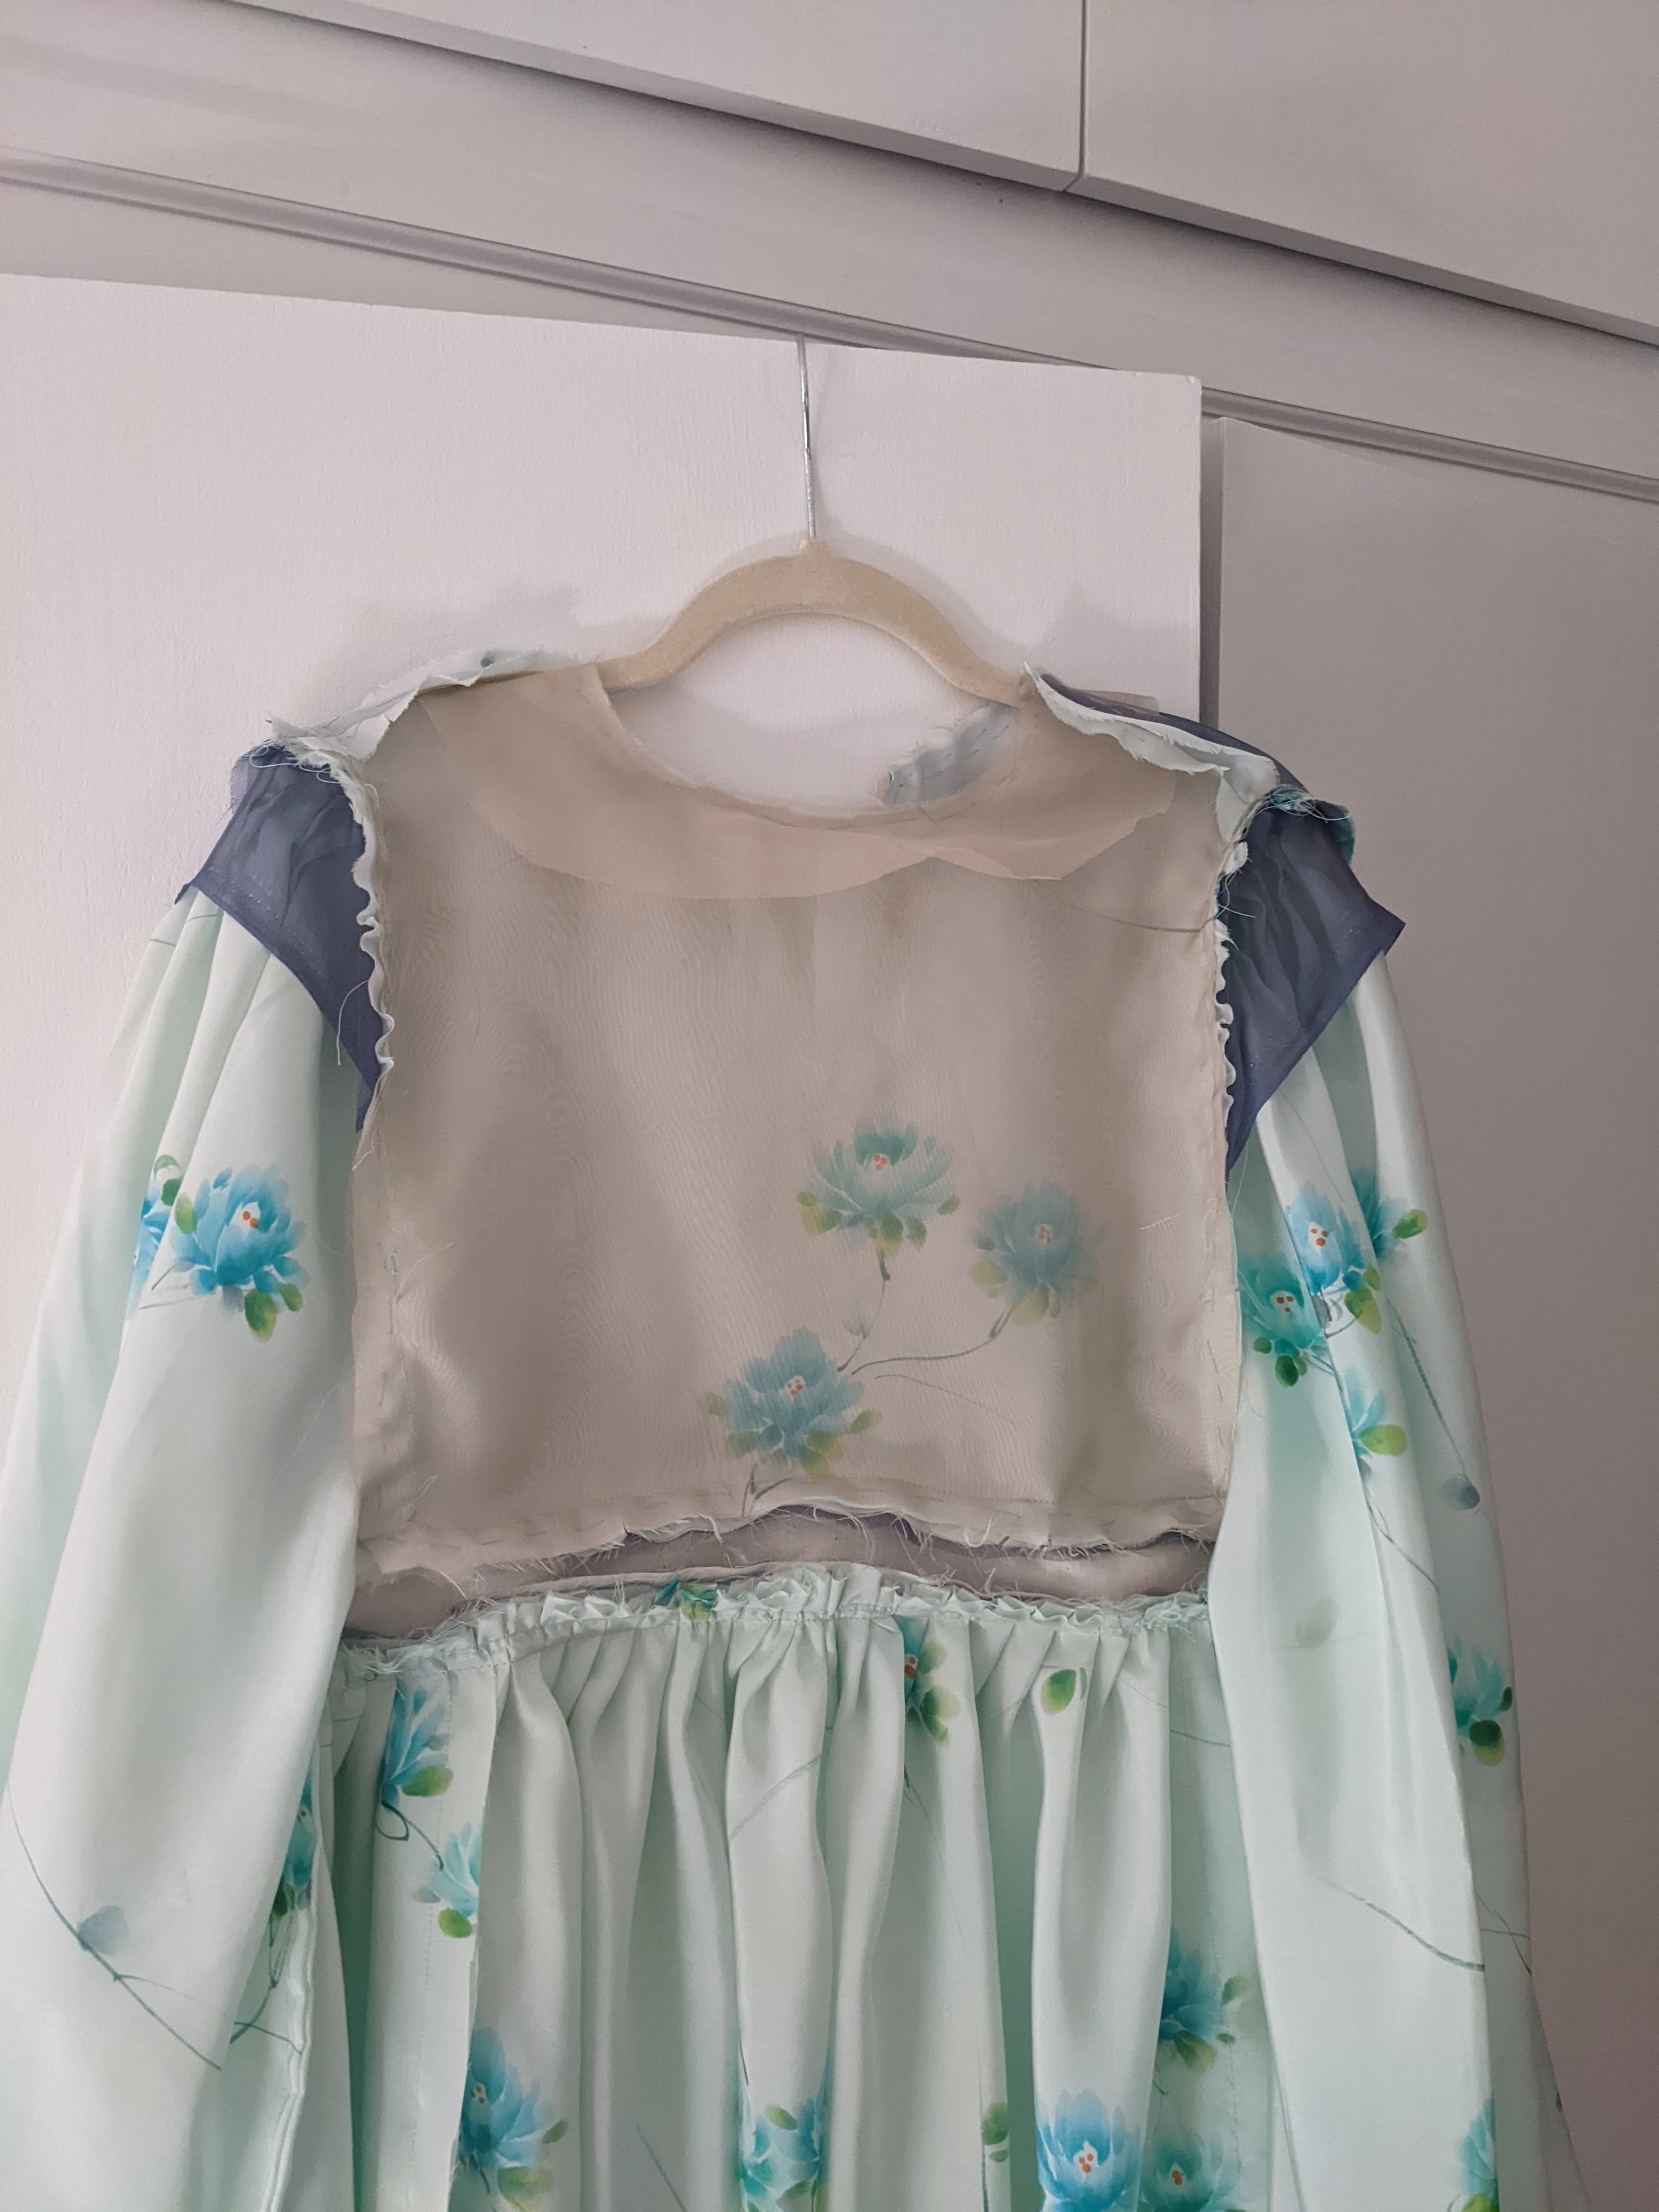
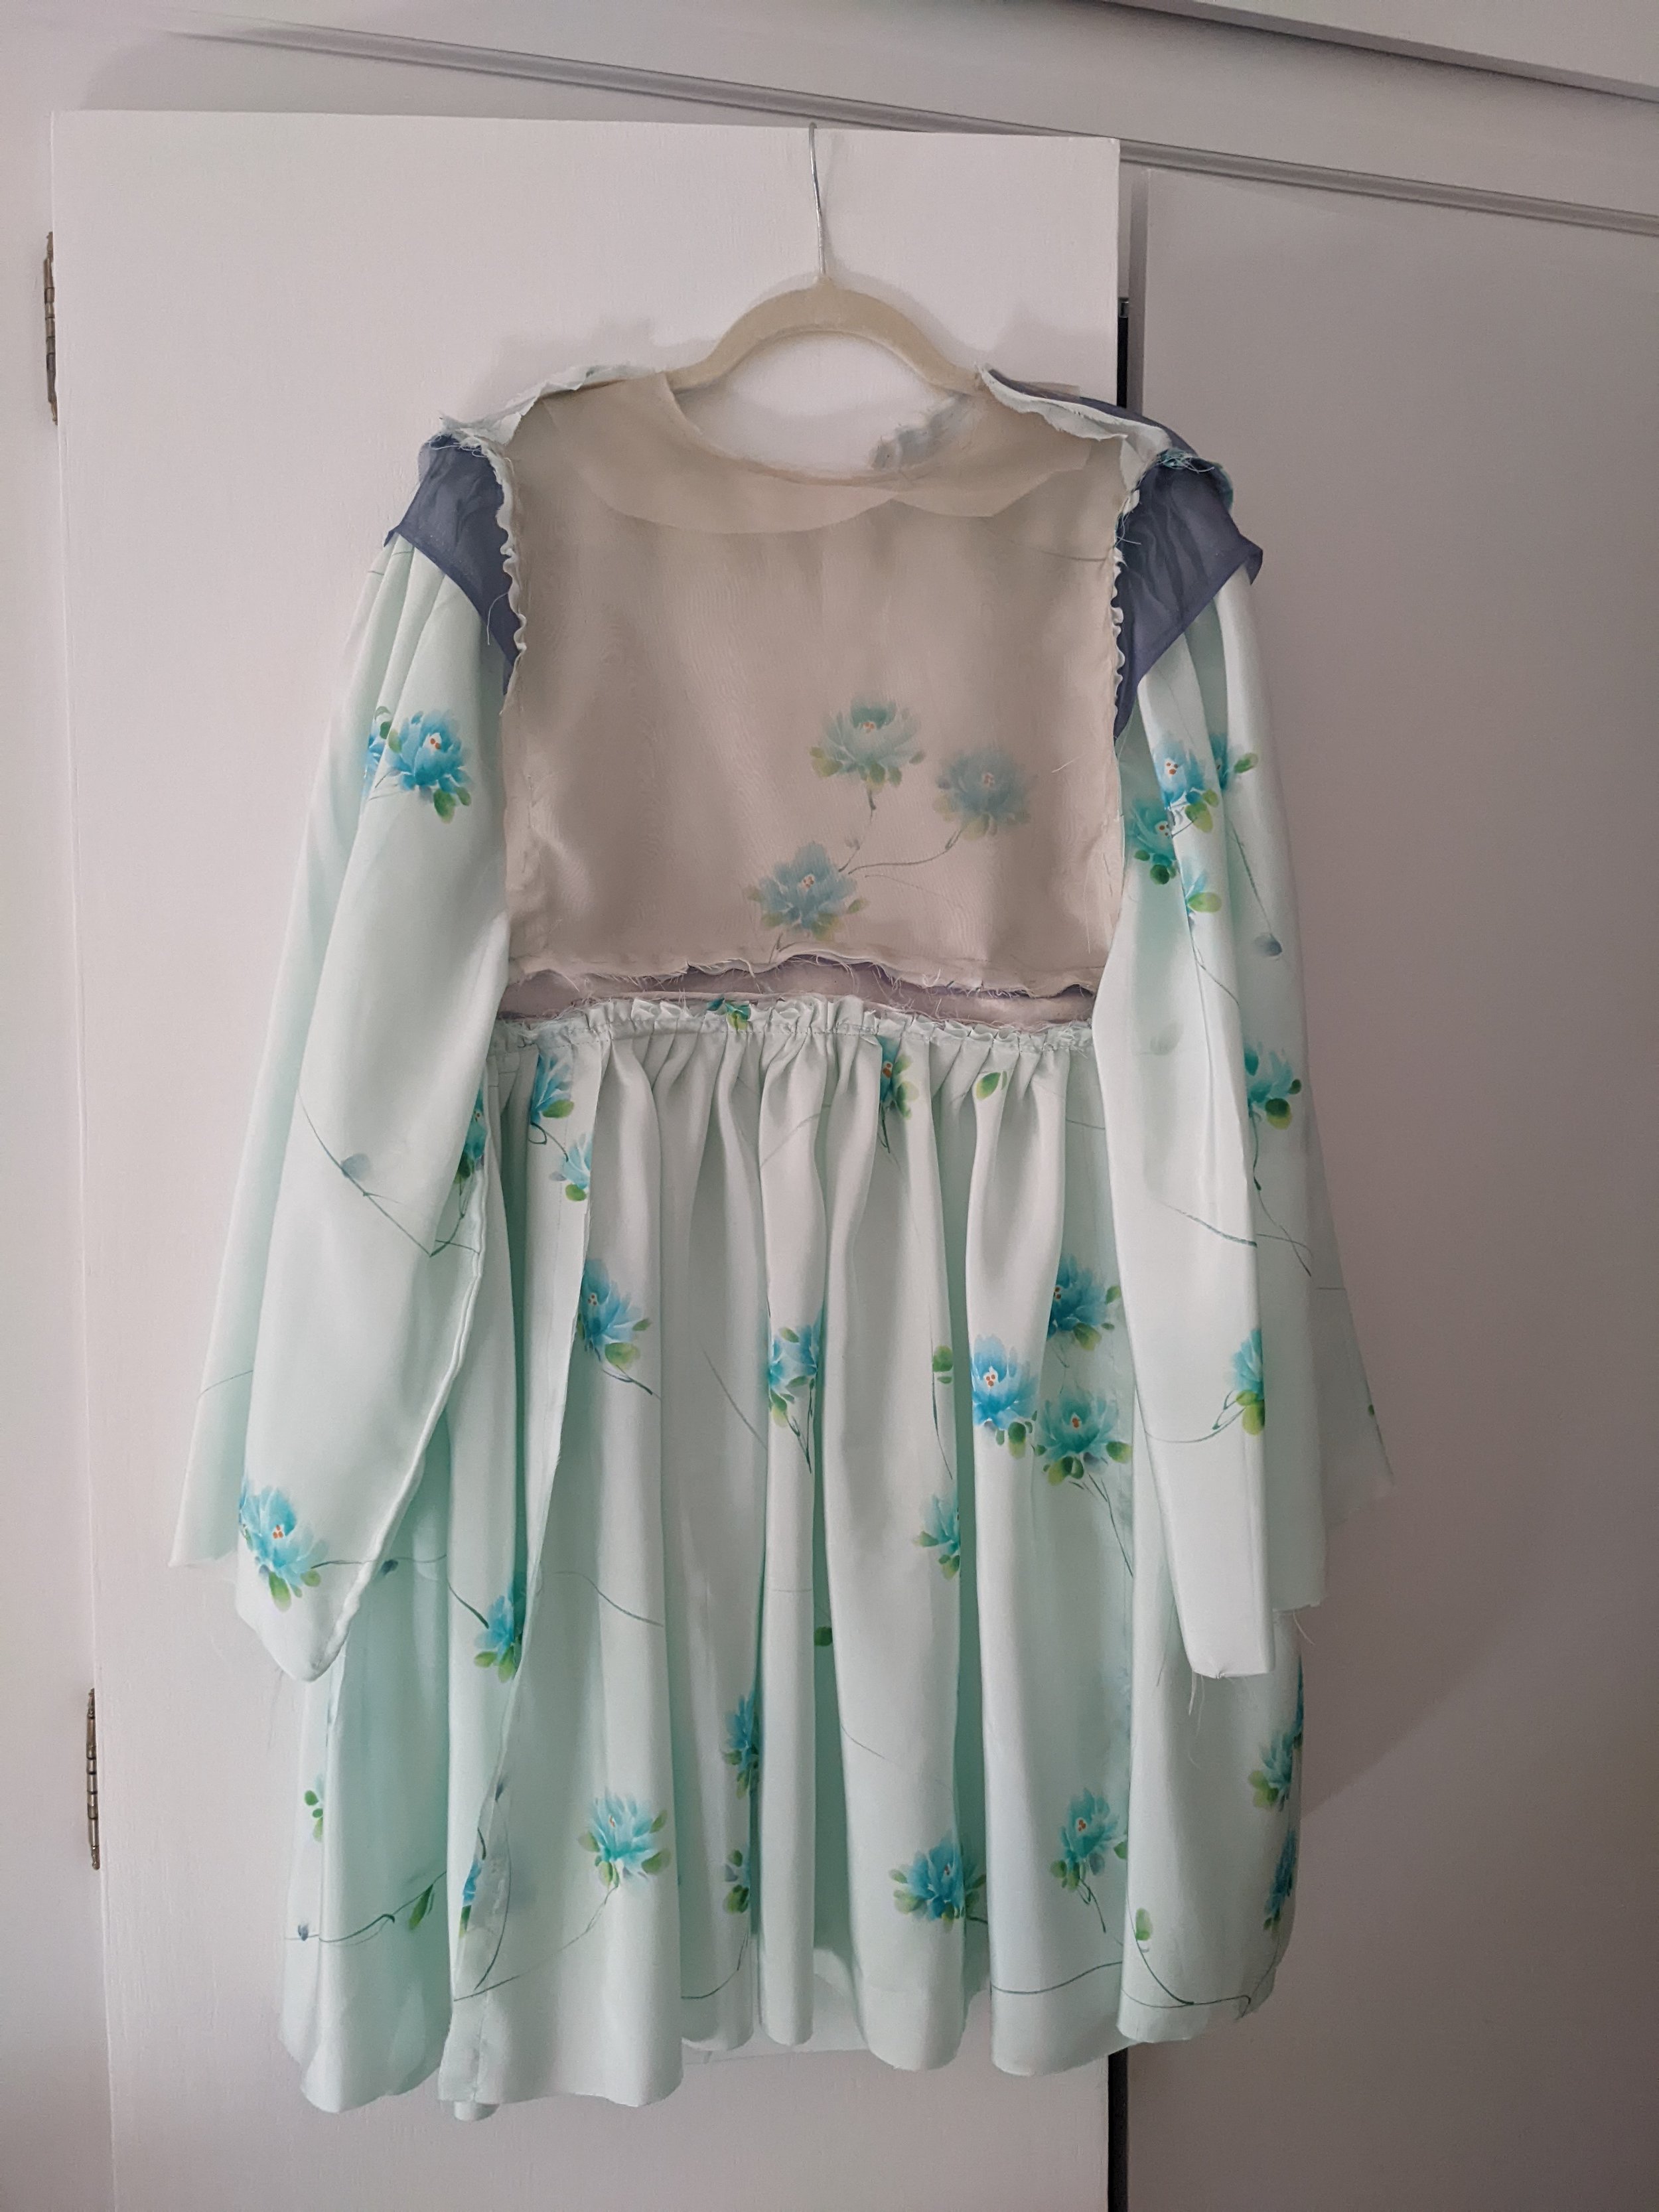
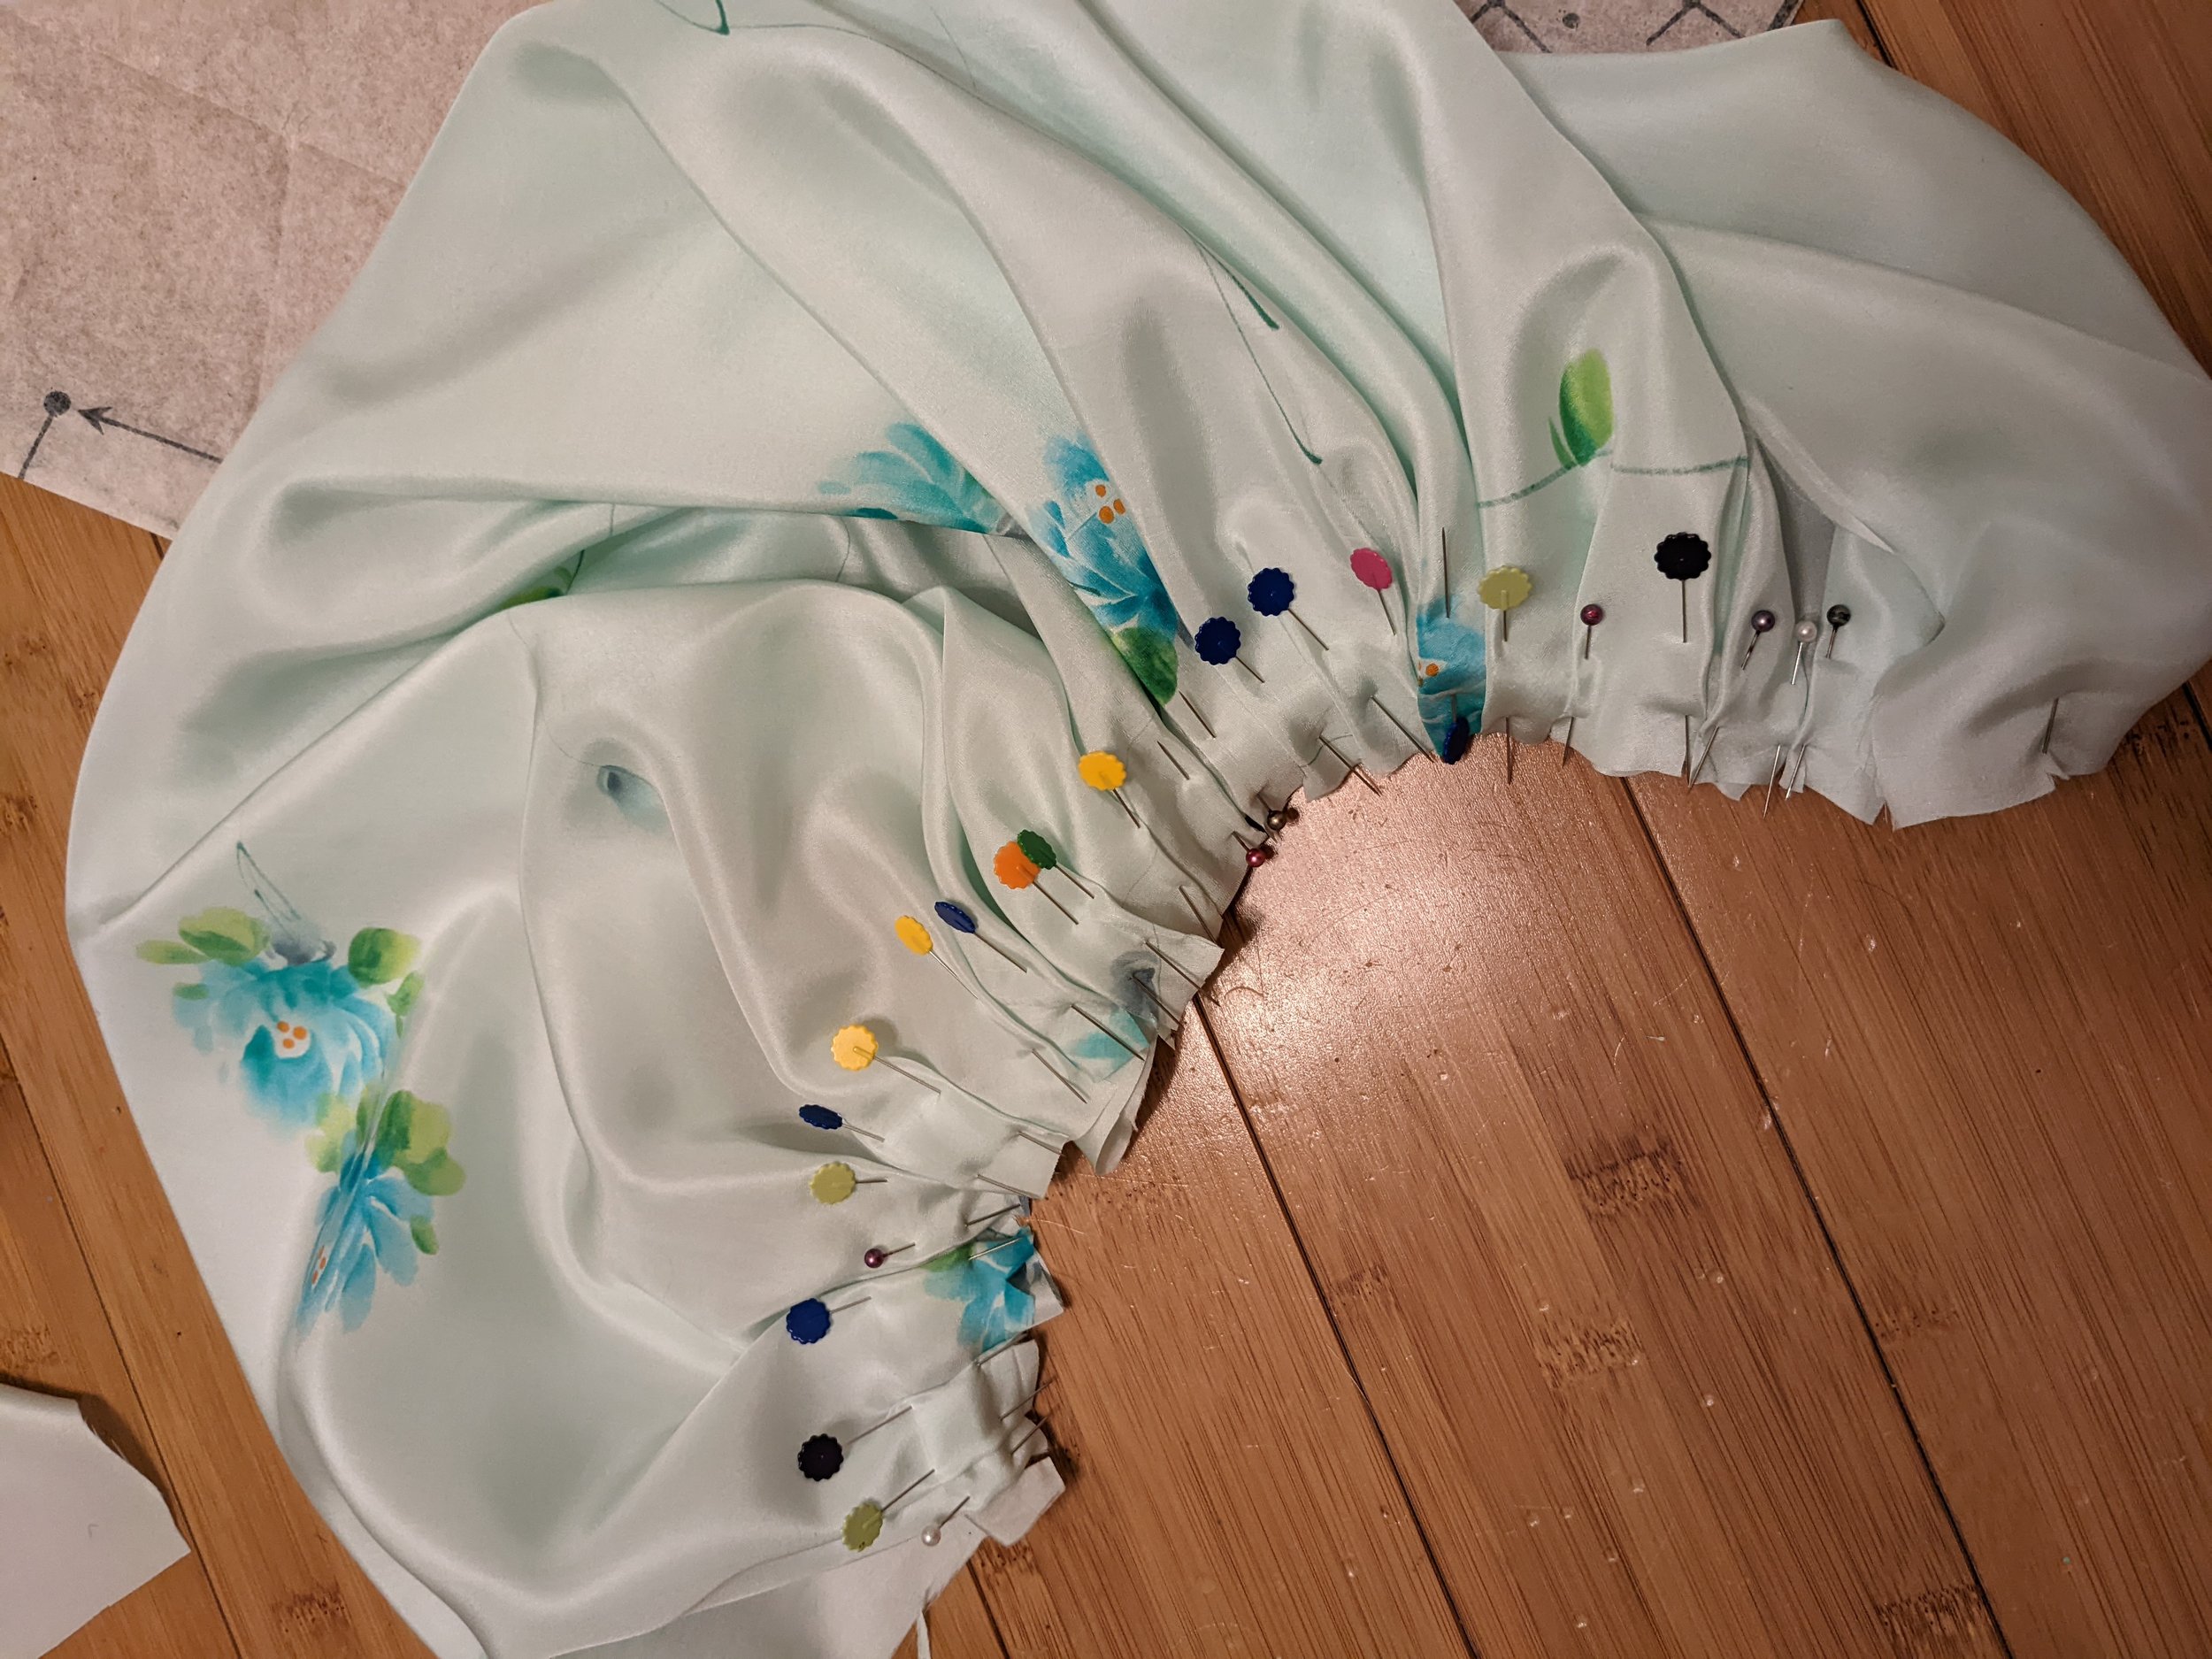
The skirt was pleated and then also eased to fit. Definitely super labor-intensive to do all that pleating (it was something like 108 inches of fabric pleated 70 times to create the 3 skirt panels - 1 front and 2 back pieces) and then to ease it in a little more to fit the waistband.
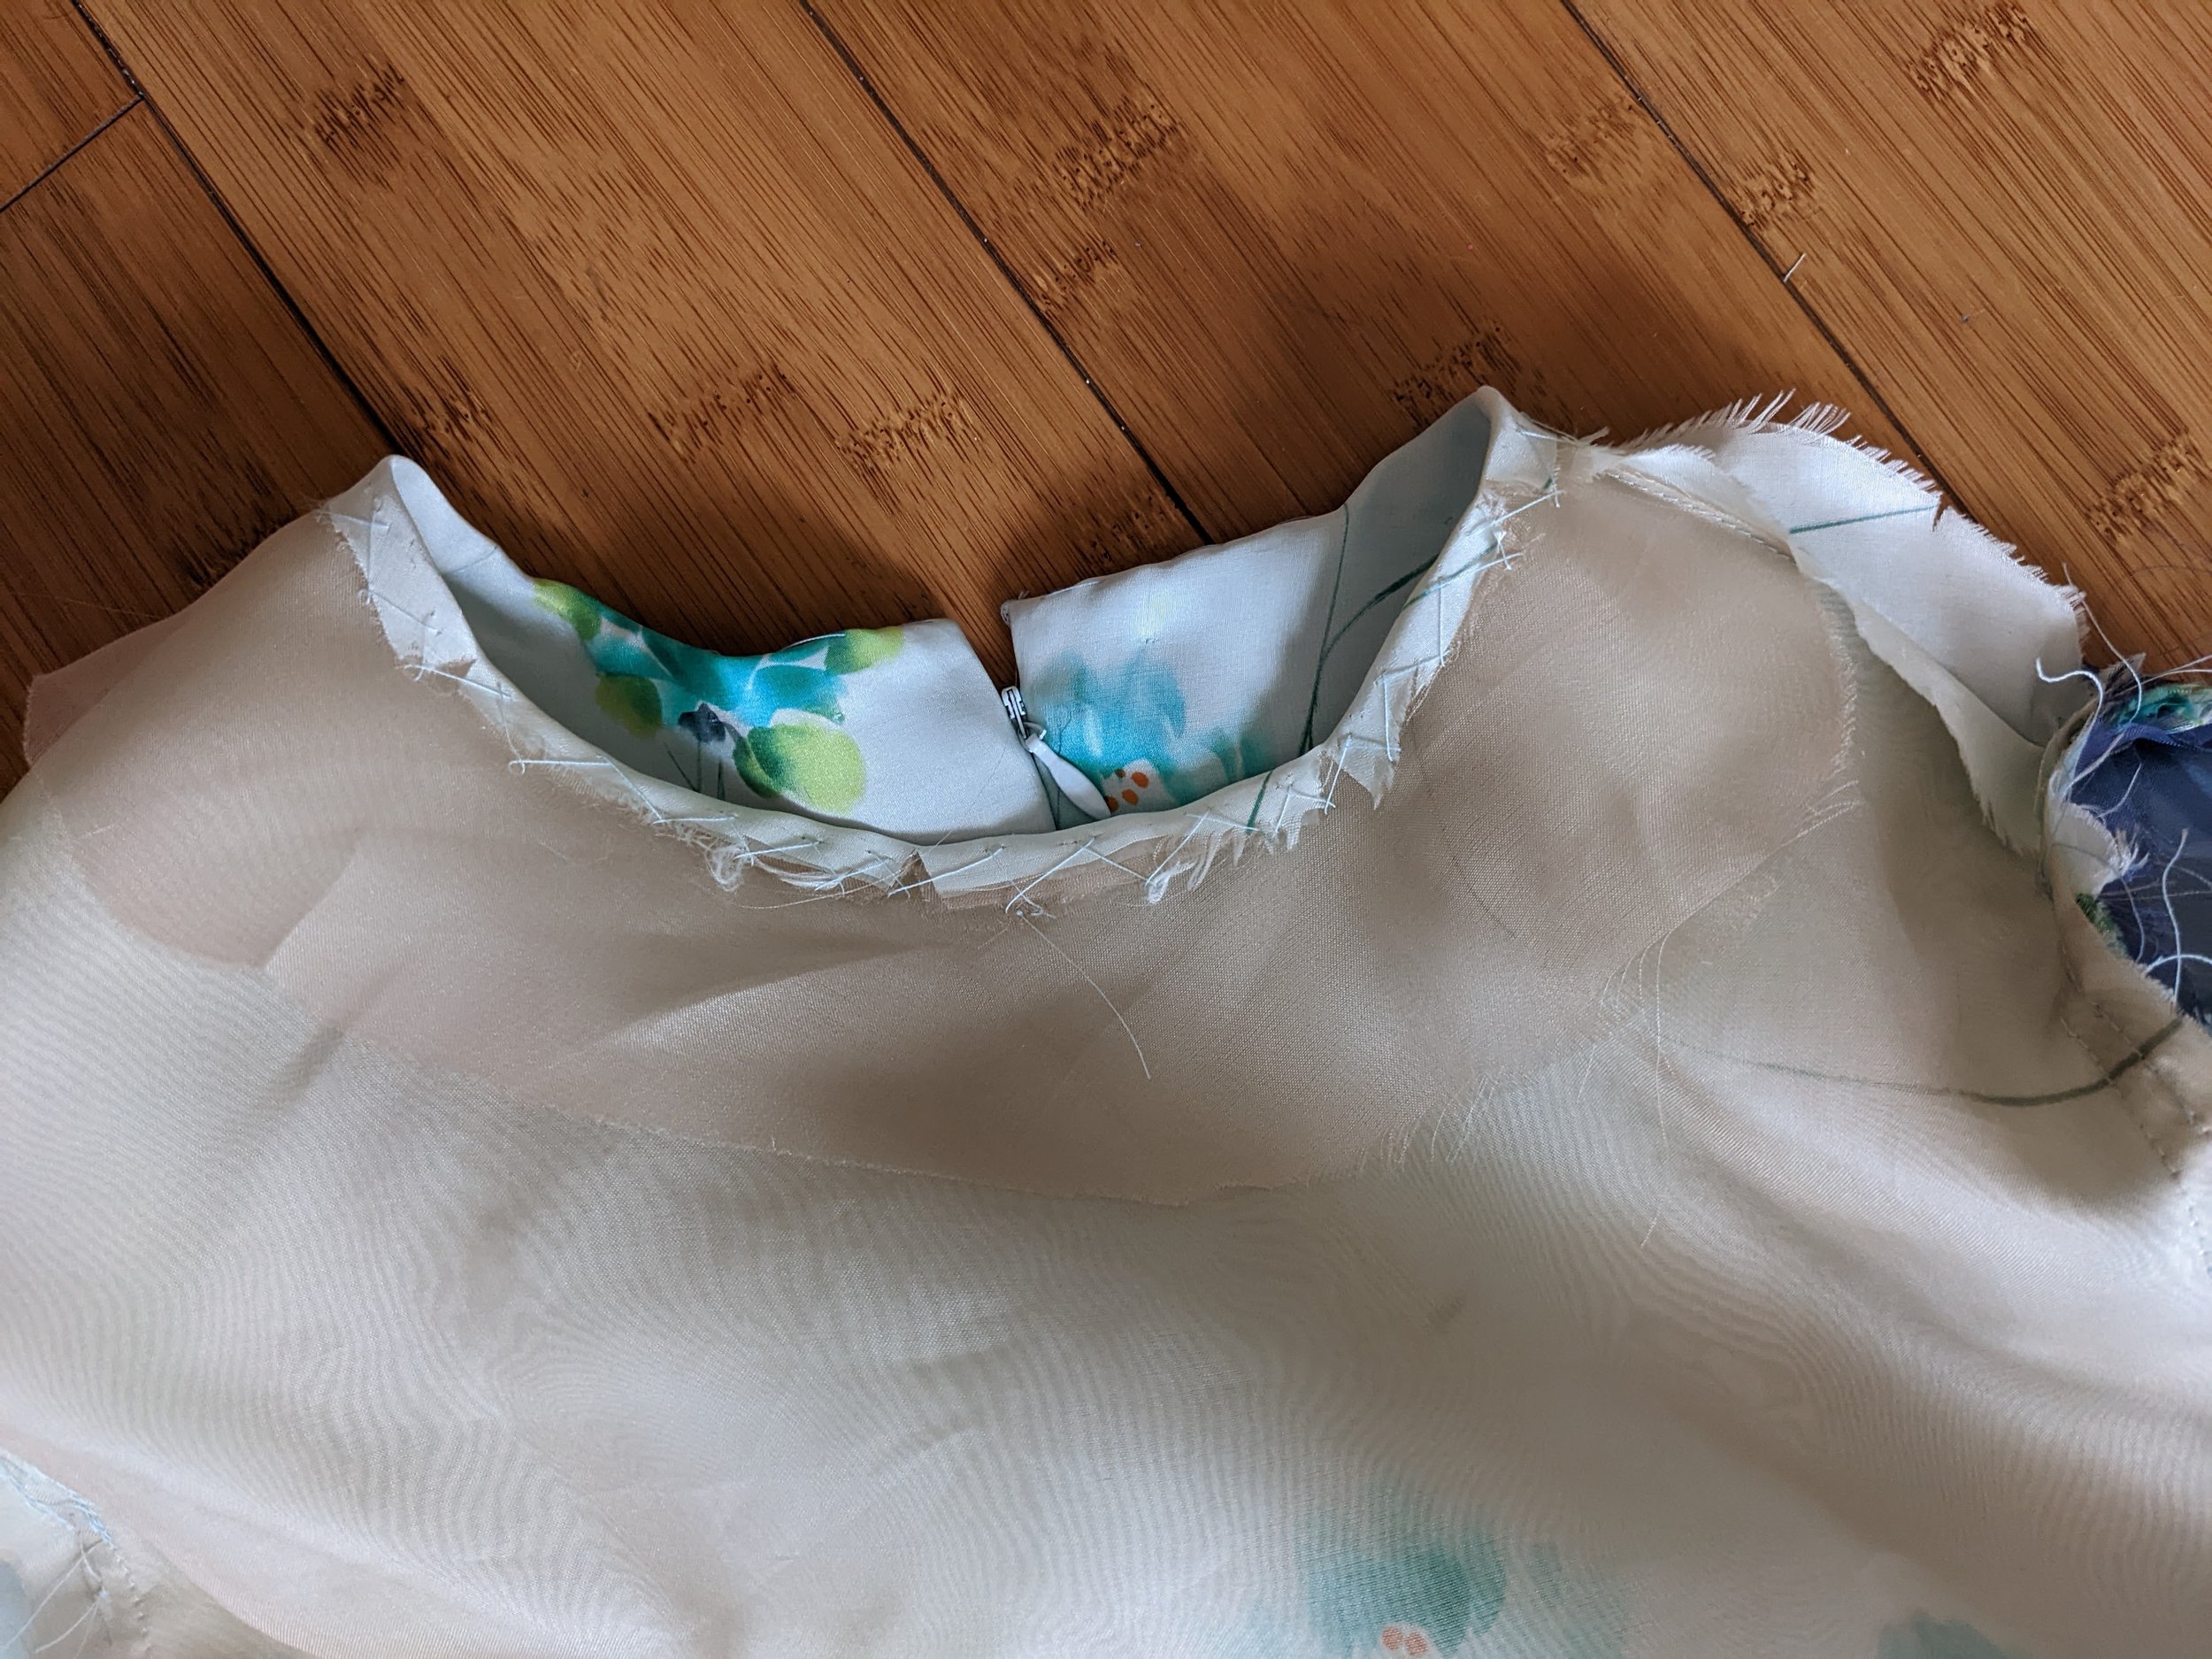
Then the skirt was lined (not the top yet) and THEN it was time for zipper insertion. The zipper is inserted into the skirt lining and the bodice. I had never done this before although of course I’ve seen many dresses that are zipped in the lining but not the skirt - it is common in vintage as it hides most of the zipper and prevents the full skirt from being interrupted. I read these instructions so many times: “Place closed zipper, face up, under bodice and skirt lining opening edges … sew in place by hand, keeping skirt free.”
For some reason I could not comprehend where the skirt would ultimately be attached to the bodice/lining. Finally it clicked. I sewed the zipper along the lining and, keeping the outer skirt attached to the waistband, sewed up the bodice back. I followed every single step in this Kenneth King zipper insertion video - all of the interfacing (I used fusible), the basting, the 2nd basting, and the trick of pulling the zipper slide down below the end of the skirt zip. I cannot express how good this technique is.
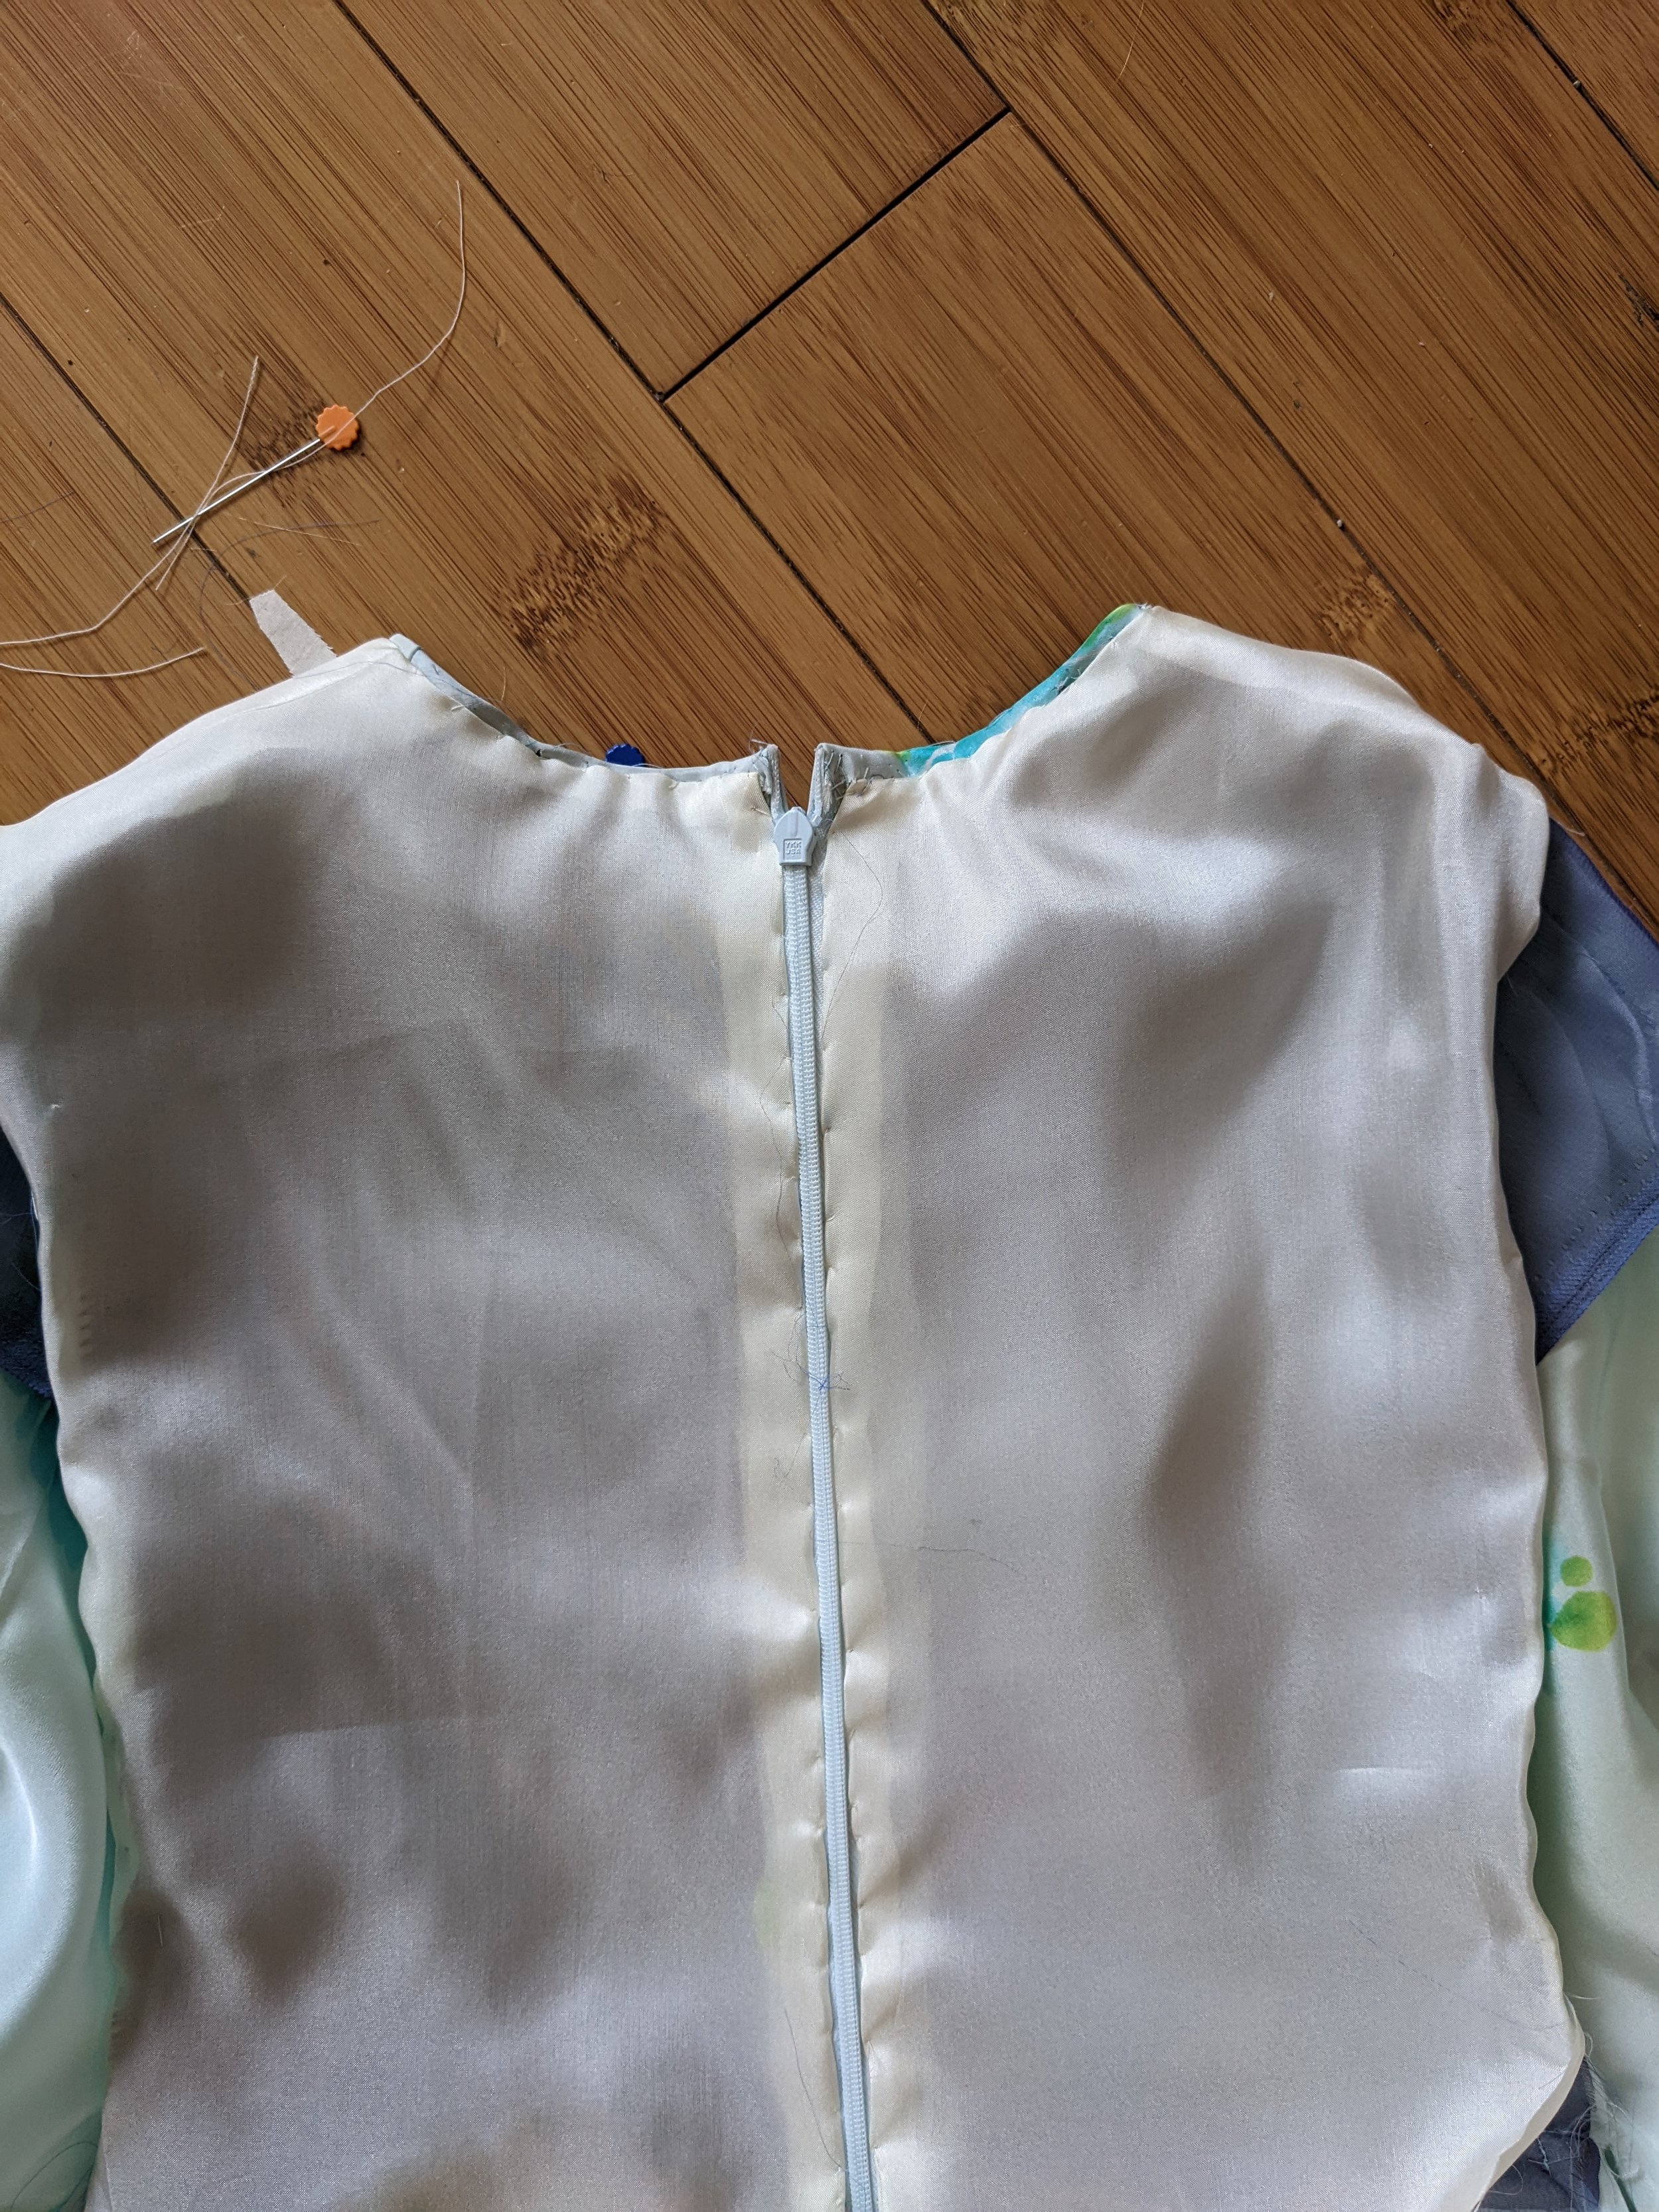
And the proof: the cleanest invisible I’ve ever sewn, and it was sewn into silk habotai (lining) and organza-backed silk. And it’s perfect! (I am so annoyed by that blue organza underlining but whatever.) Plus a process pic from when the zipper was basted down.
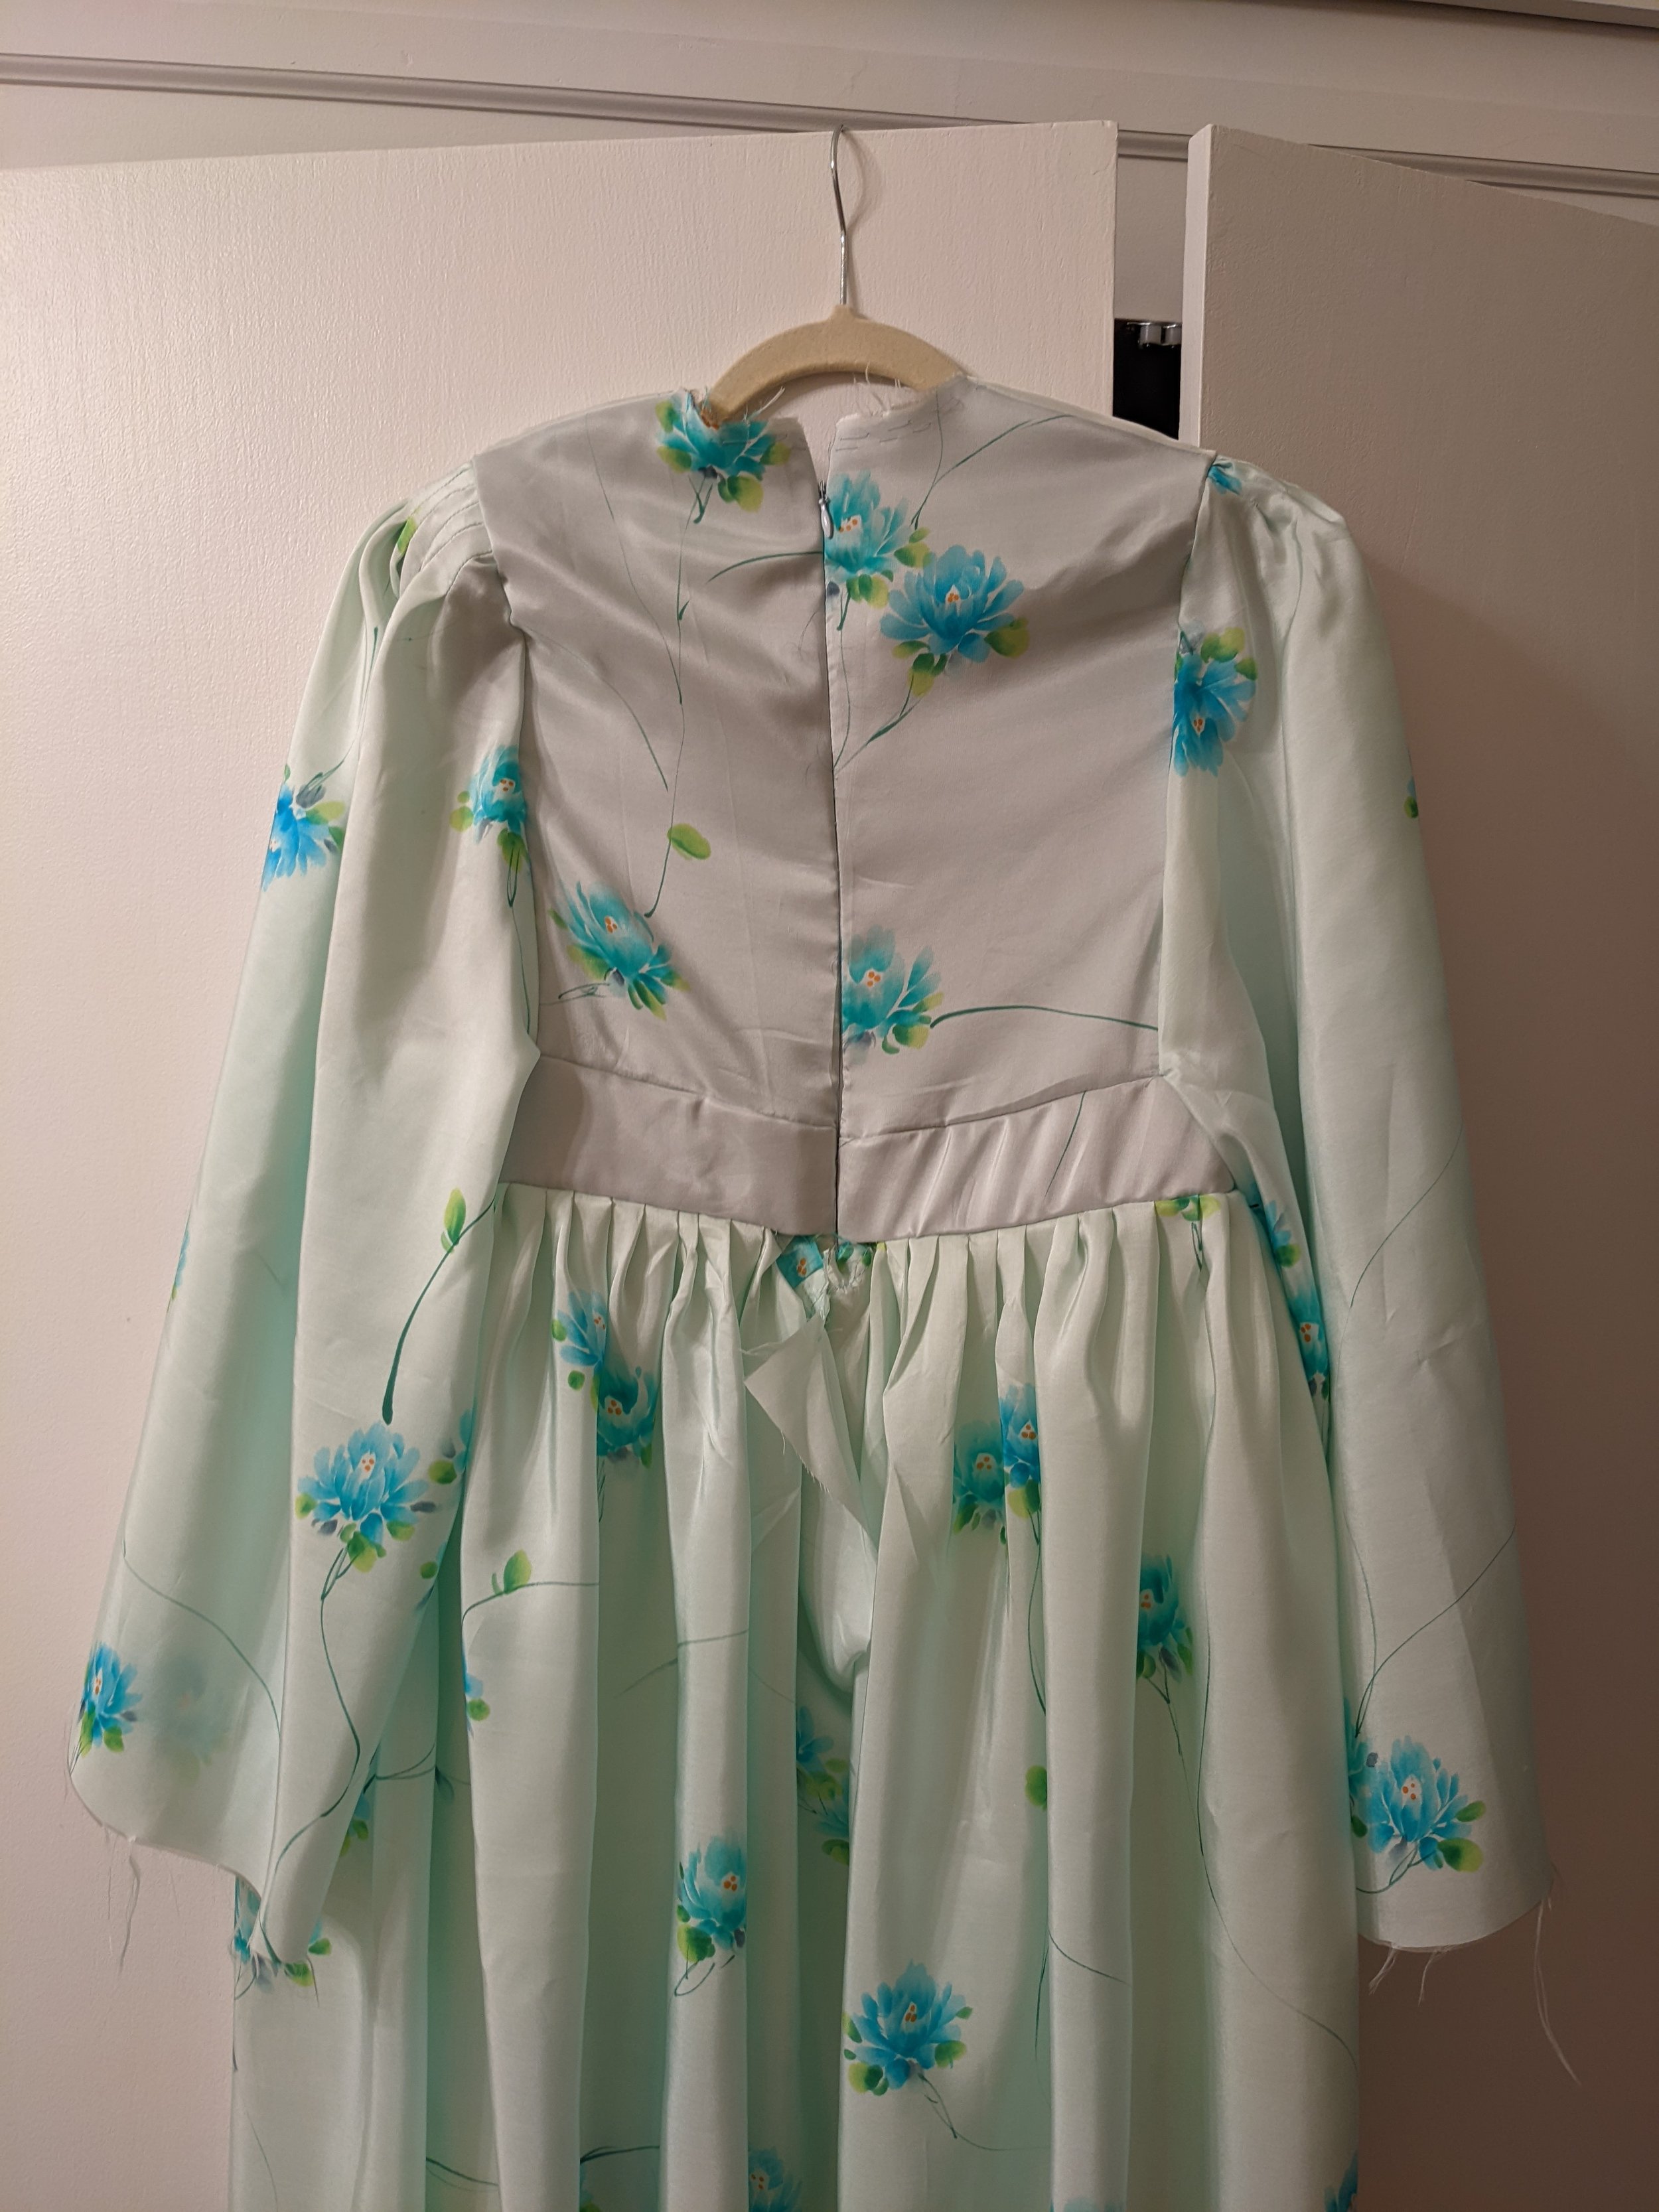
Next I catch-stitched down the neckline and then sewed in the bodice lining by hand with slip stitching. I put hook and eye fasteners into the skirt of the dress to conceal the zipper.
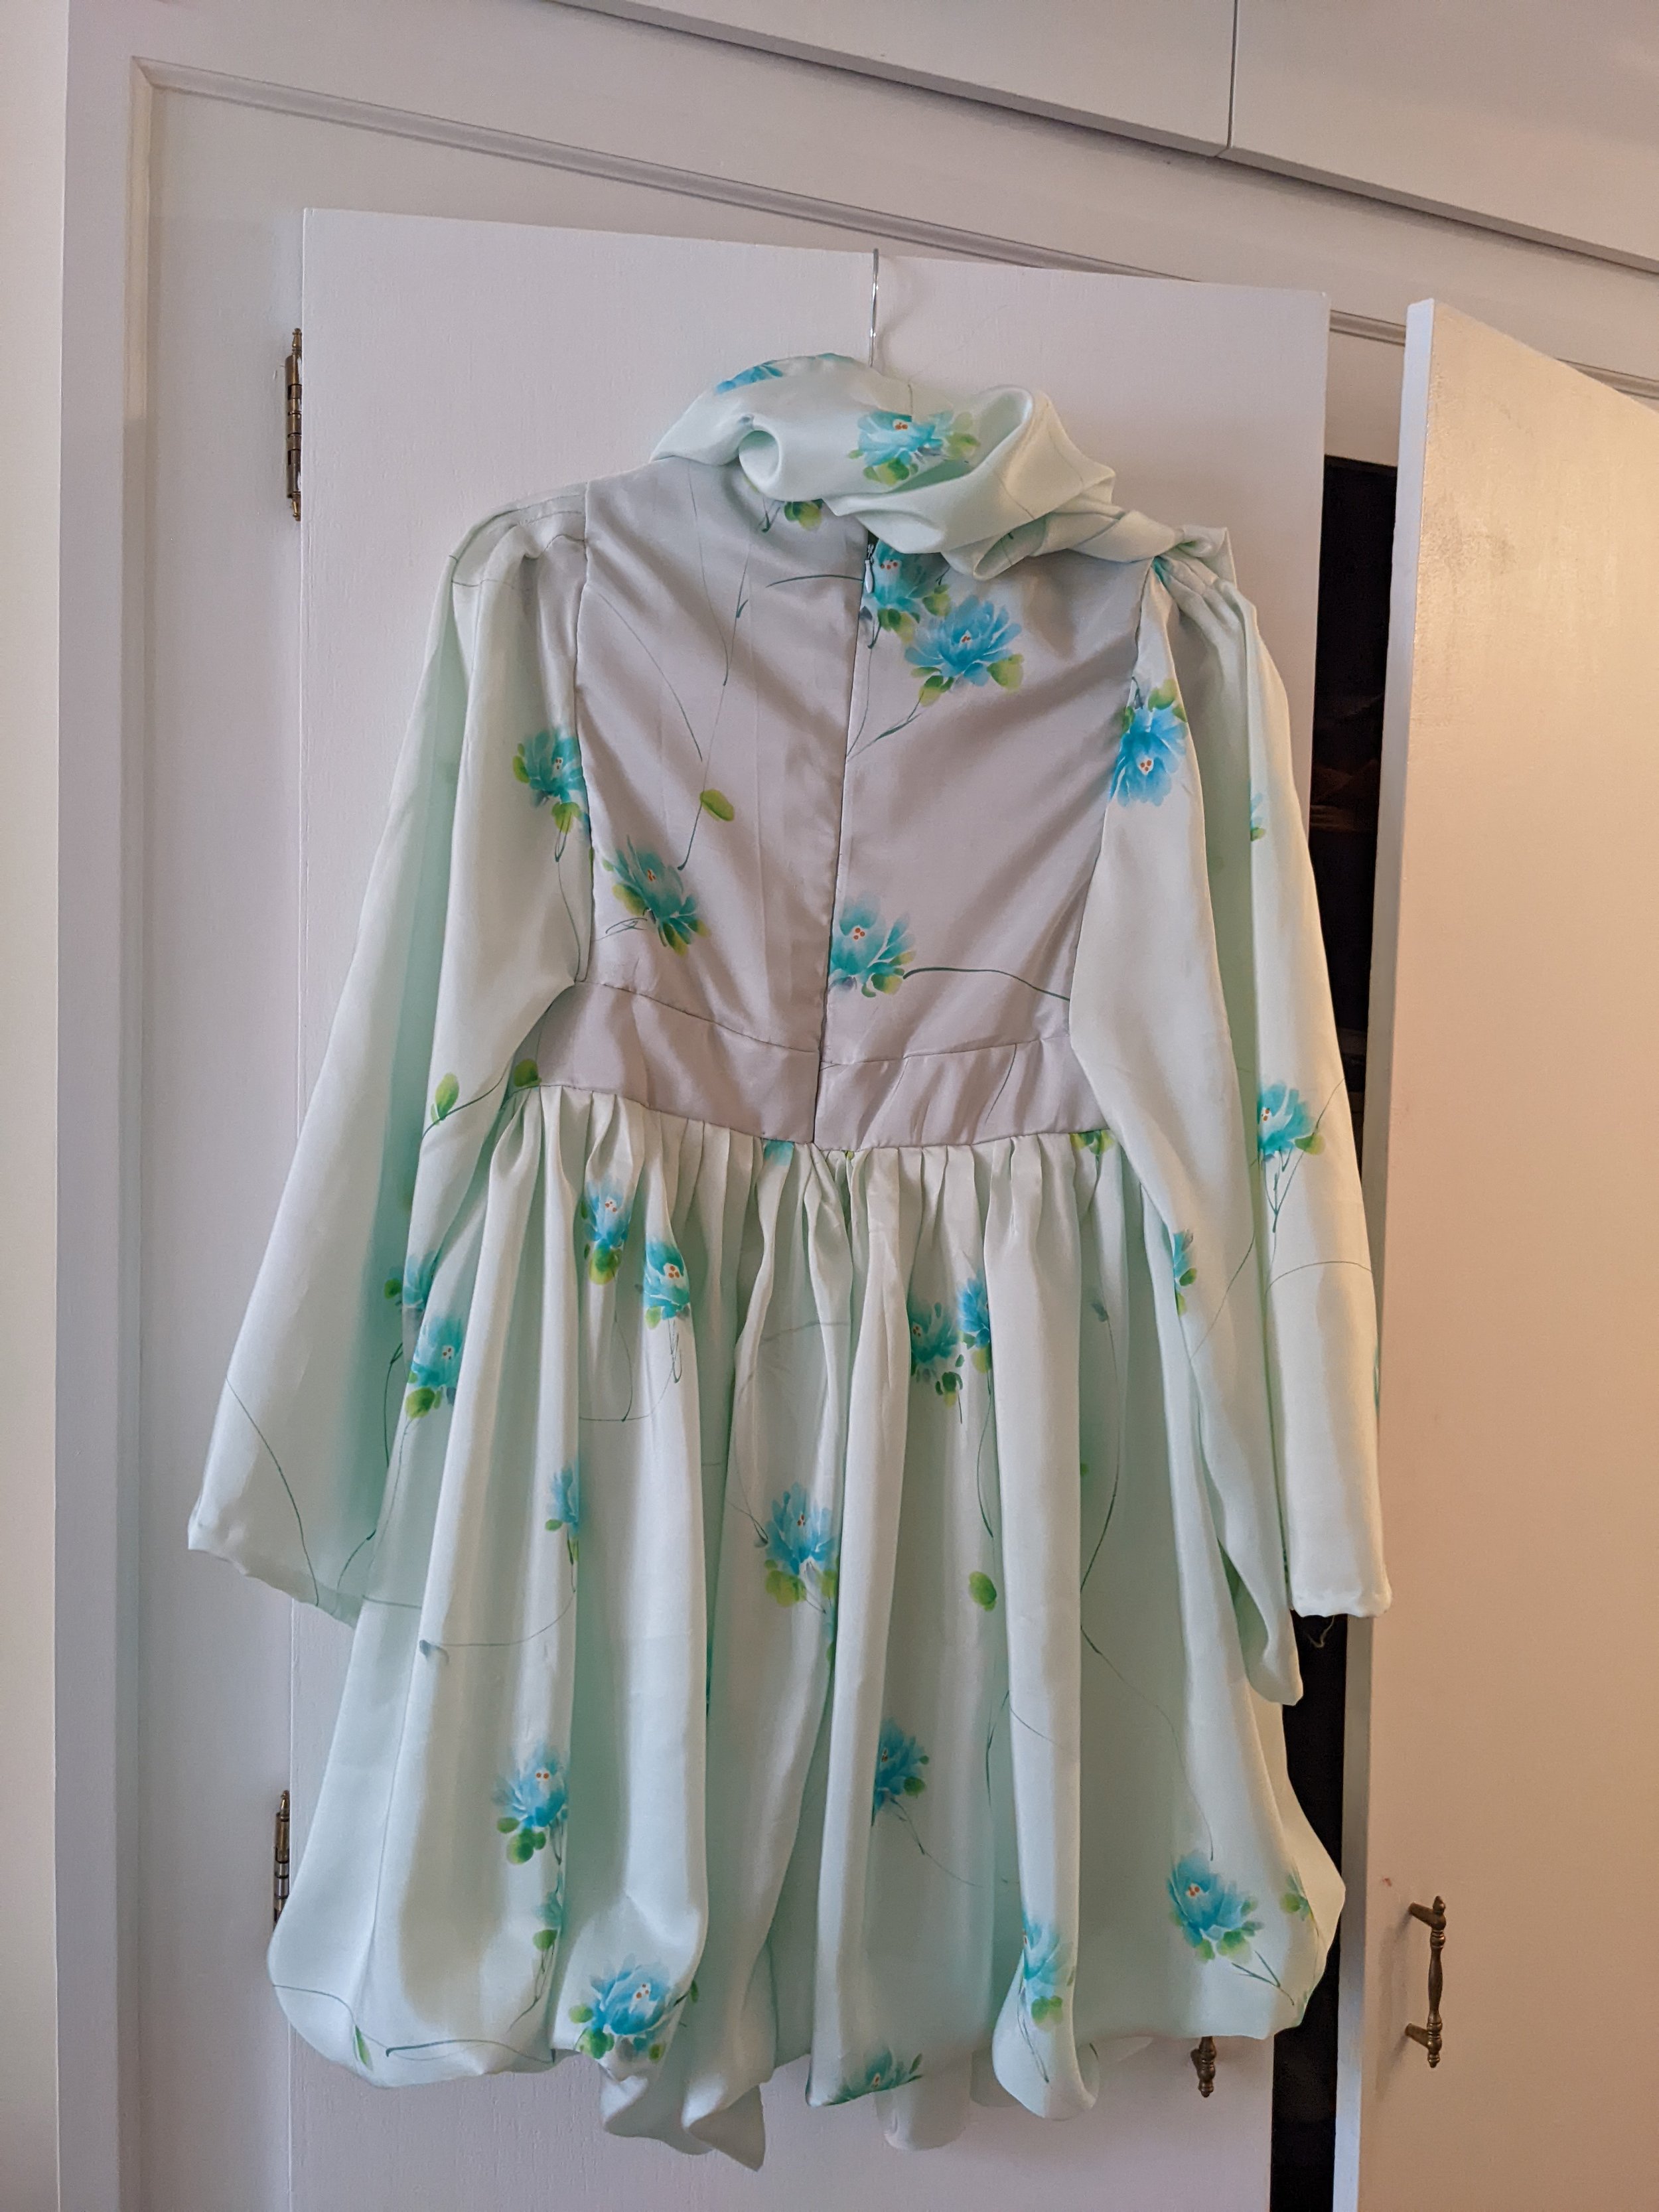
So pretty and so close to done. I blind-hemmed the sleeves and then finished the lining with a zigzag hem (so lazy) and pinned the hem of the dress, bubble-style.
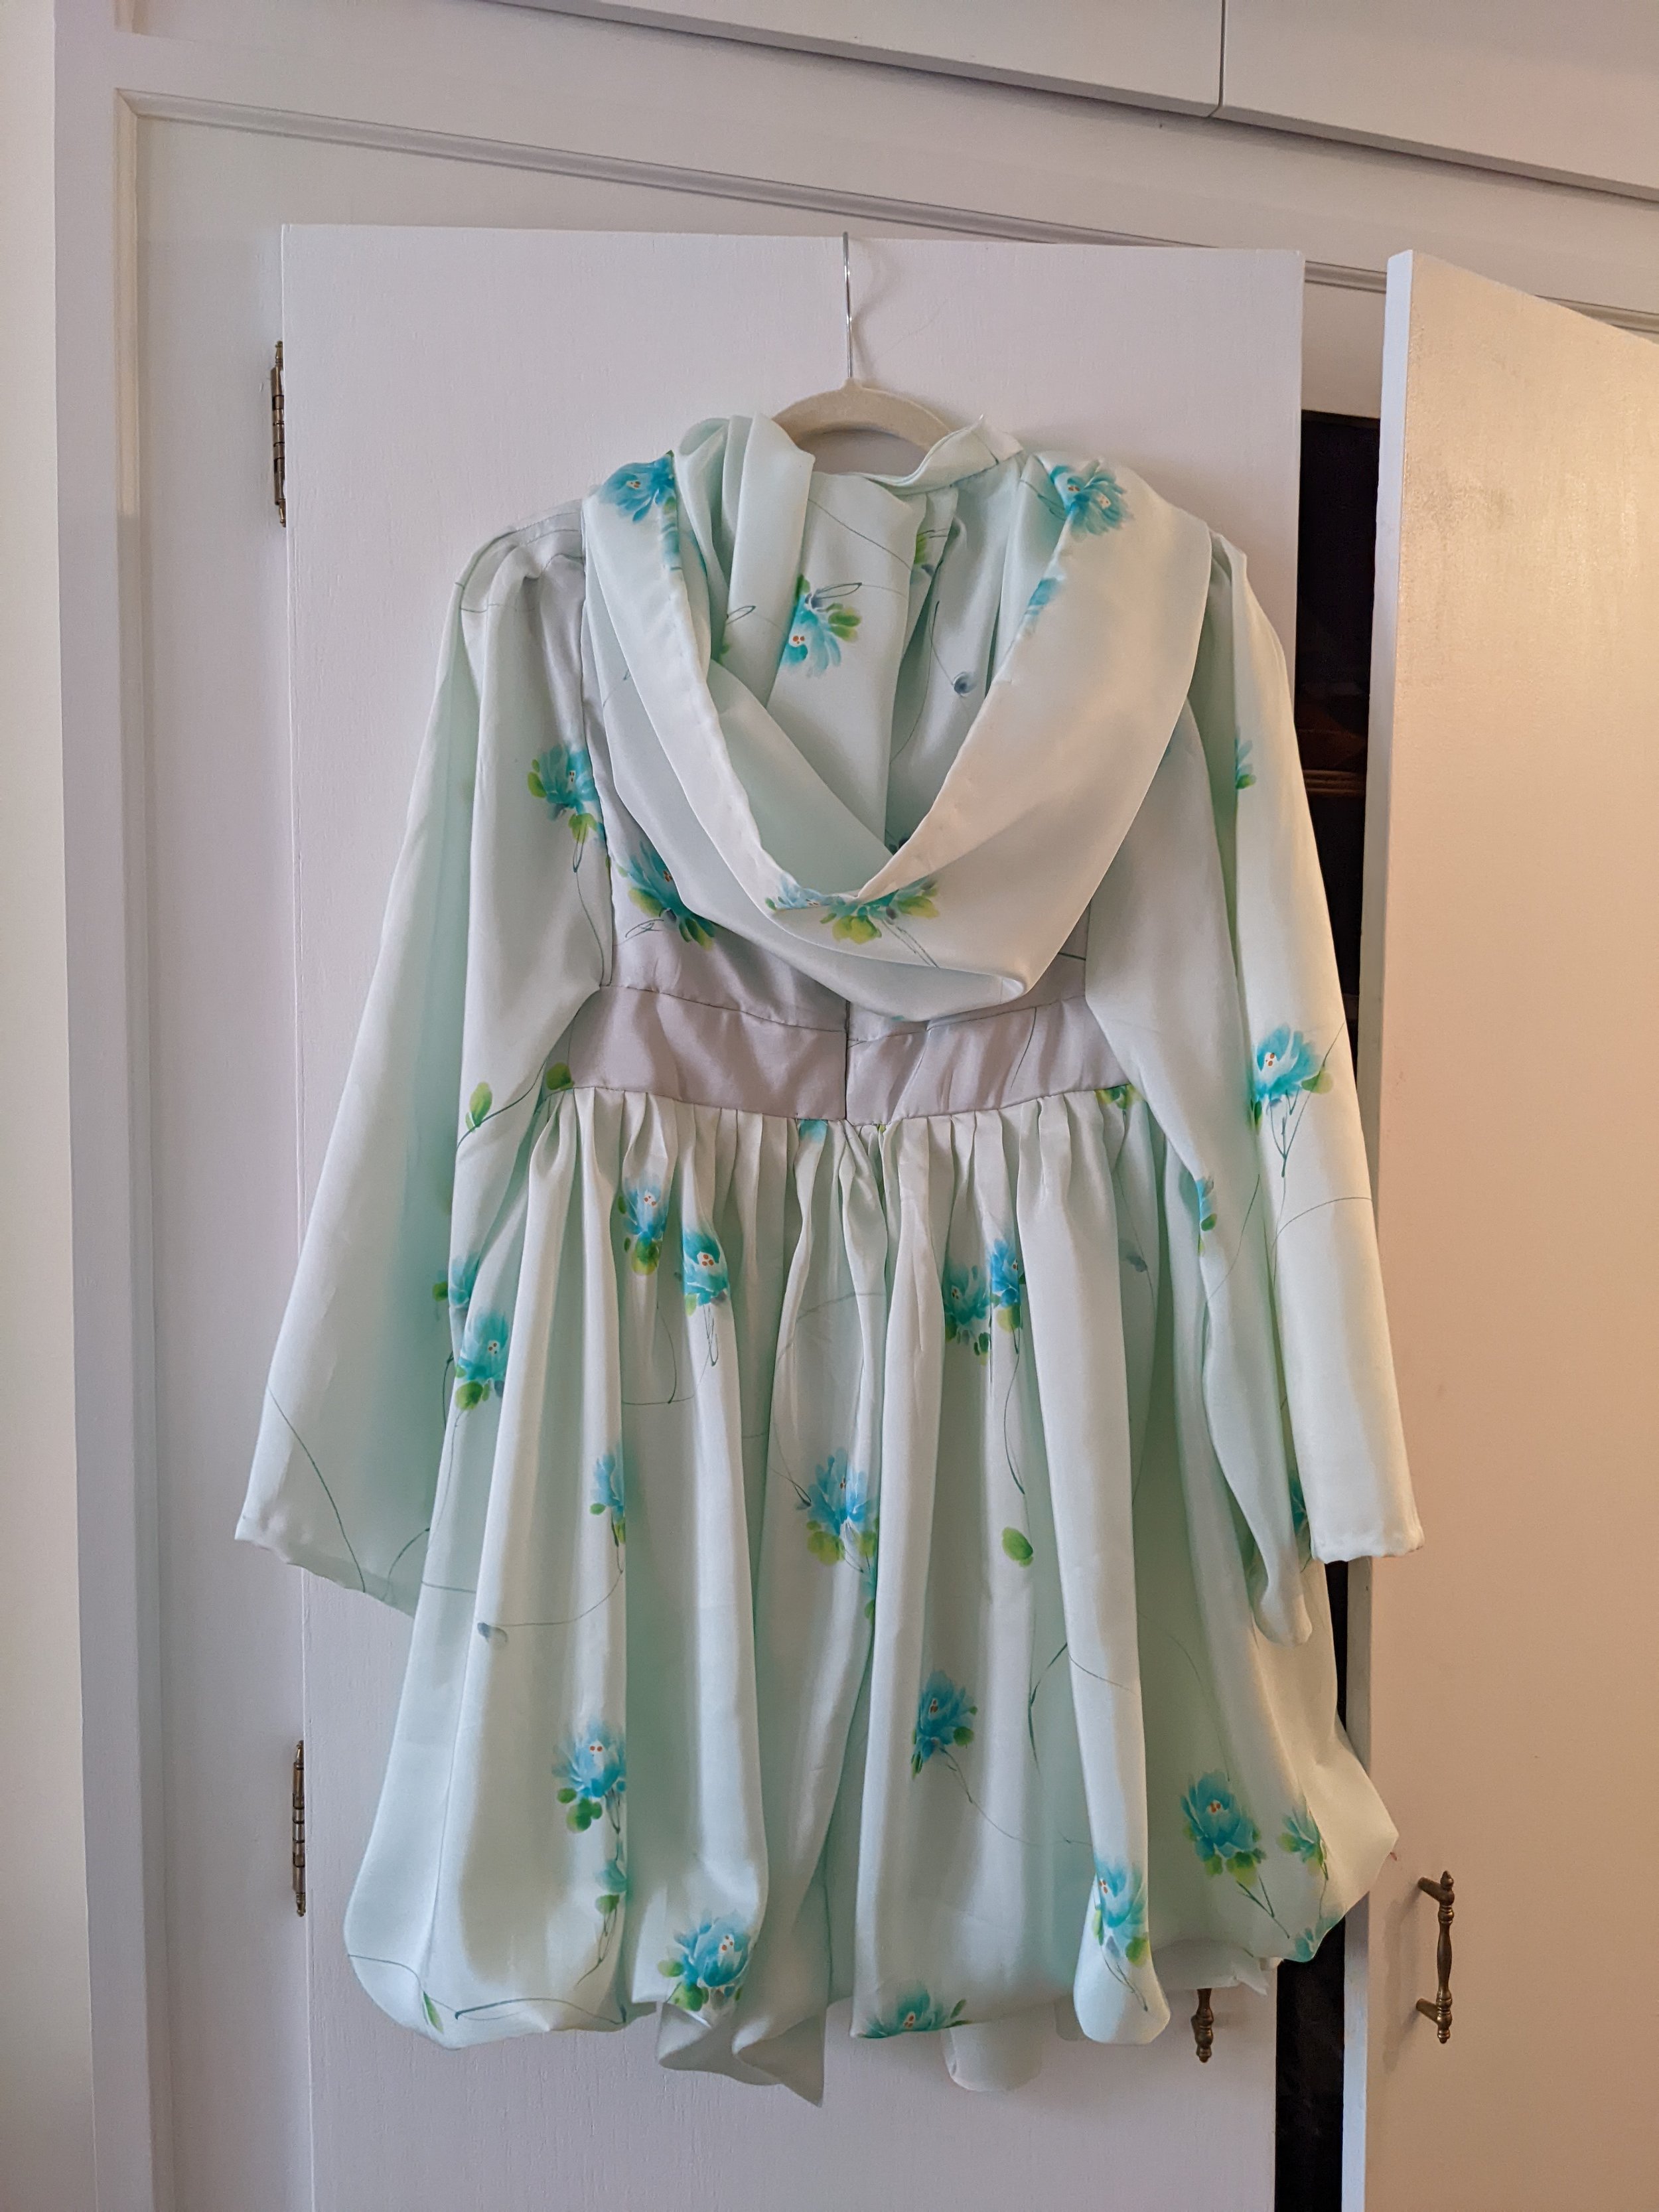
Then I had to make the hood. I did not line it - I was totally out of the Korean silk at this point. I blind-hemmed the outer edge and pleated it. The pleat pattern on the hood was very interesting. It was a combination of box pleats and asymmetrical angled pleats.
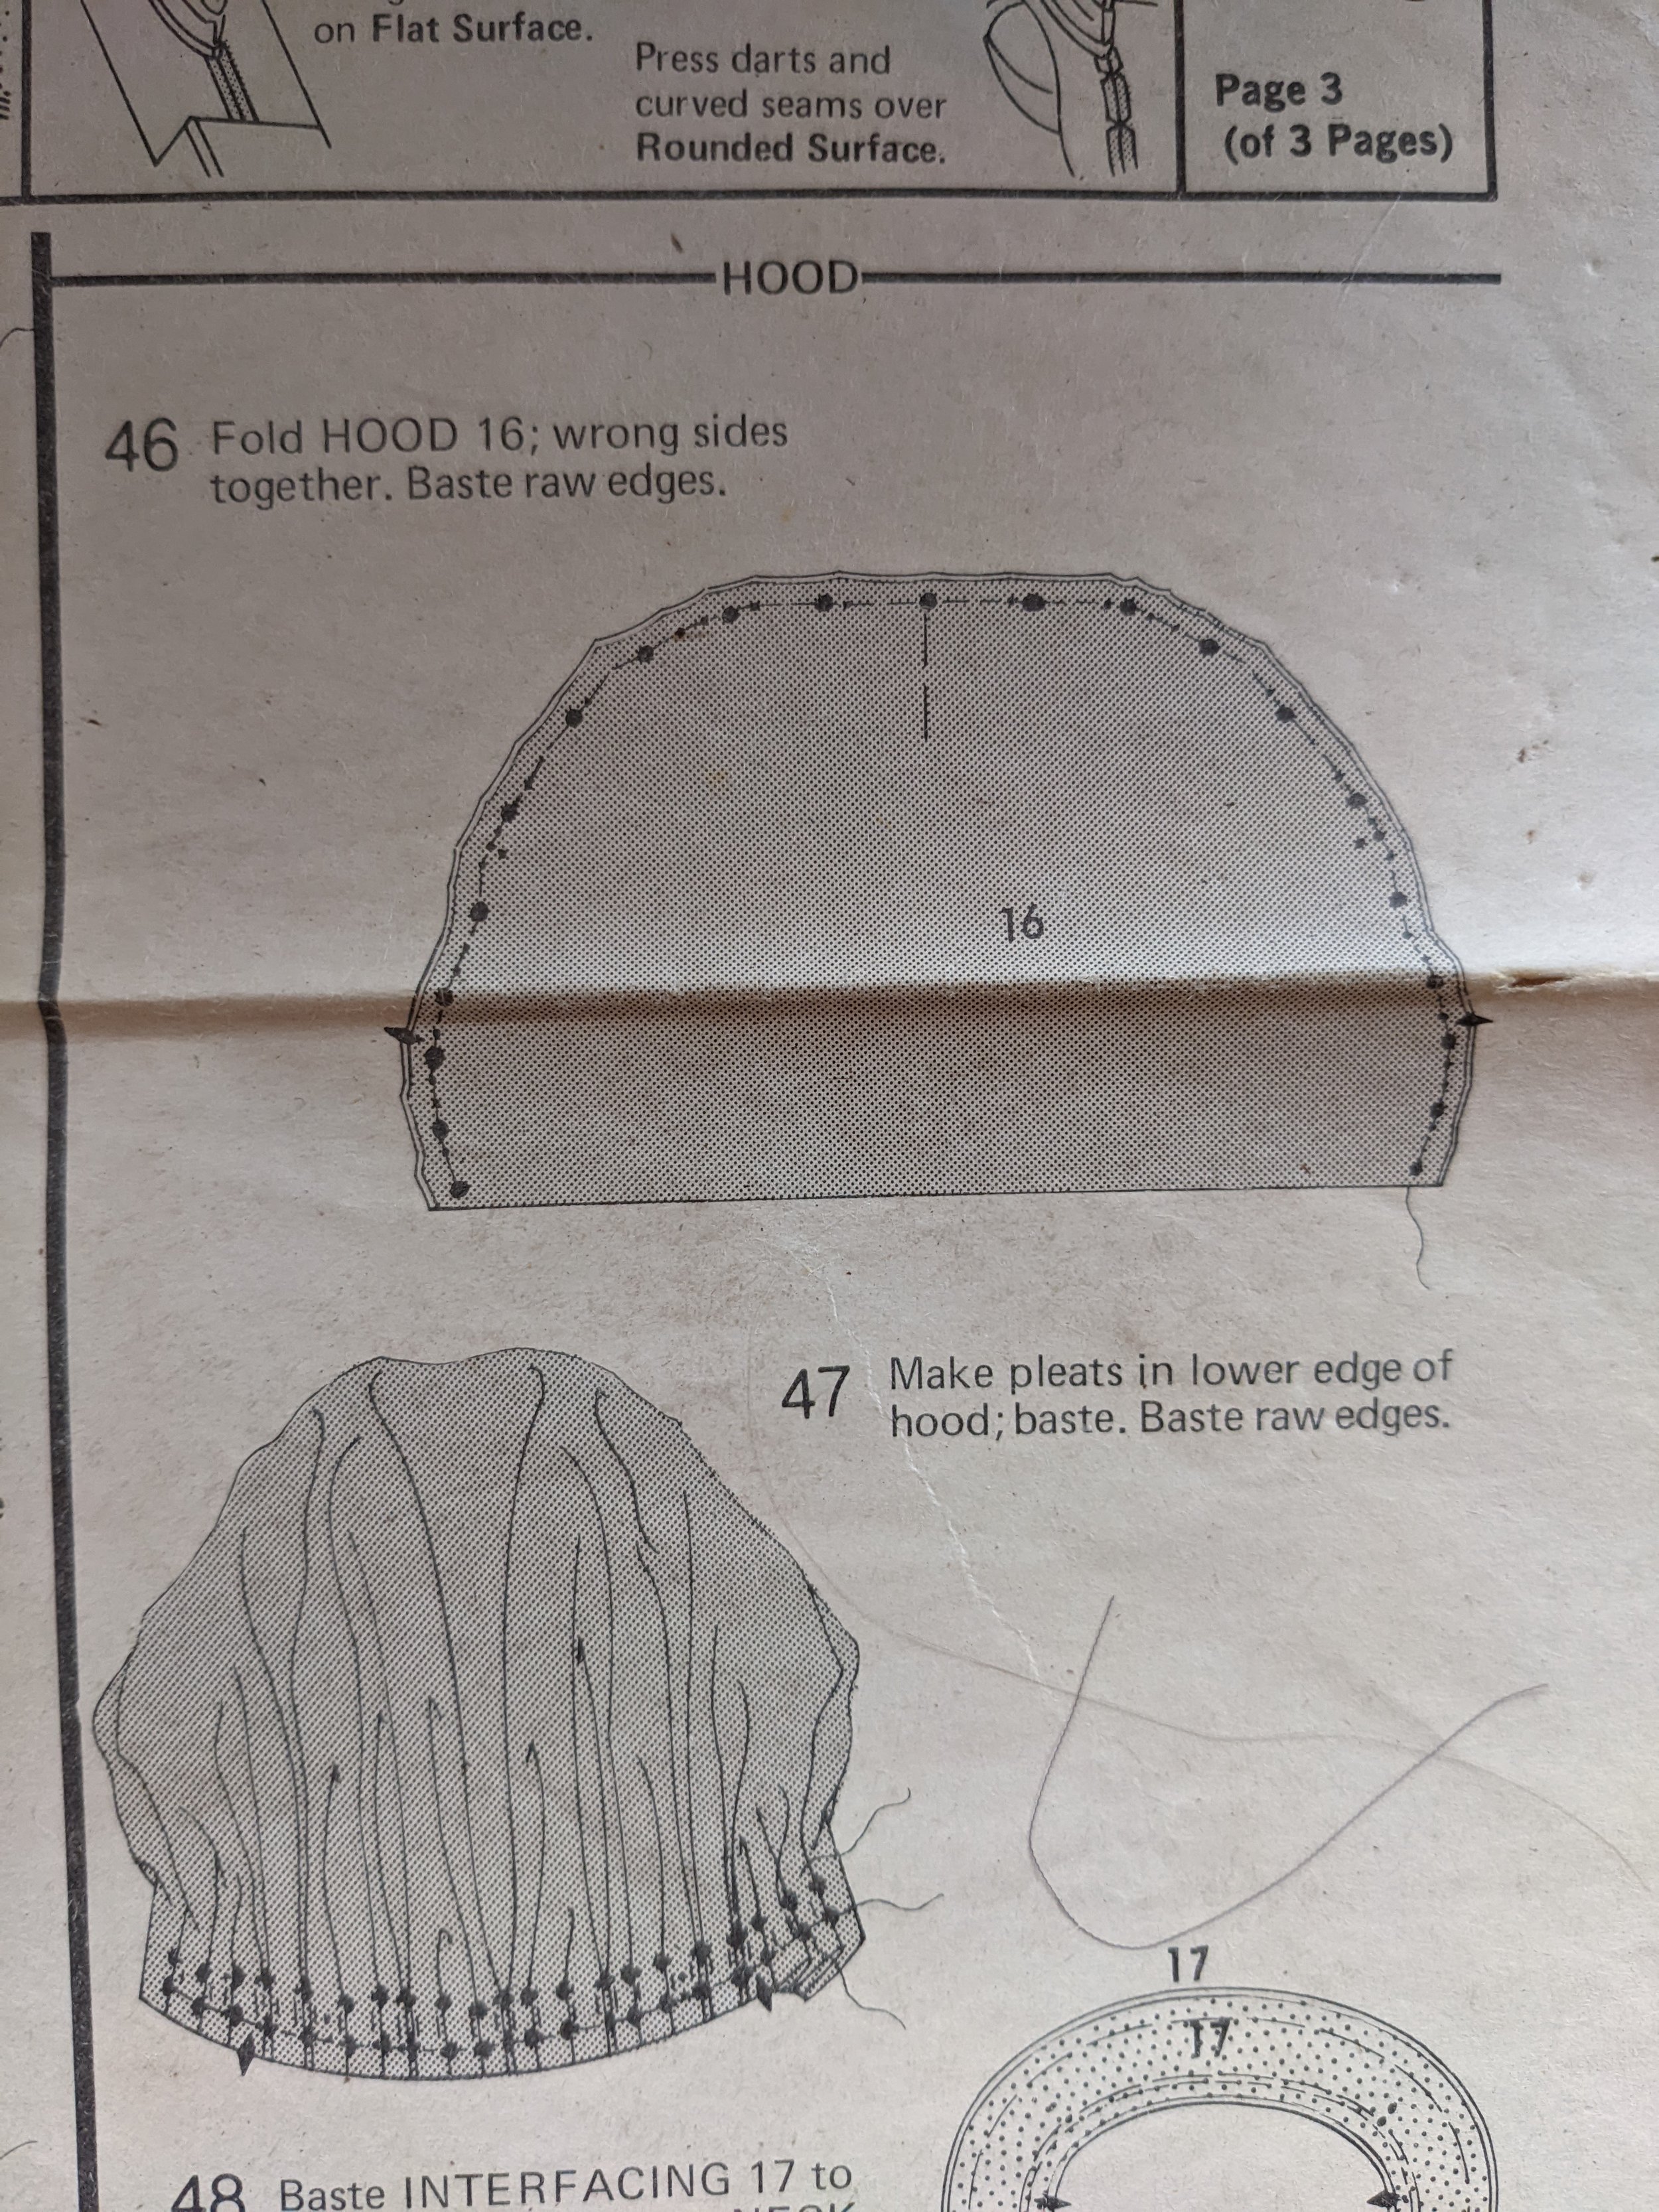
After sewing the hood into a sort of collar stand, I had to sew in snap buttons to the hood base and to the lining of the dress neckline. The hood cannot be permanently sewn in because the zipper is along the back and the hood opens to the front. I literally had to harvest snap buttons from my FIT couture binder from the Covered Buttons unit because I only had 2, needed 4, and ended up with 3. The dress was done on Saturday night.. After 4 days of nonstop sewing and probably like 25 hours of work. :)
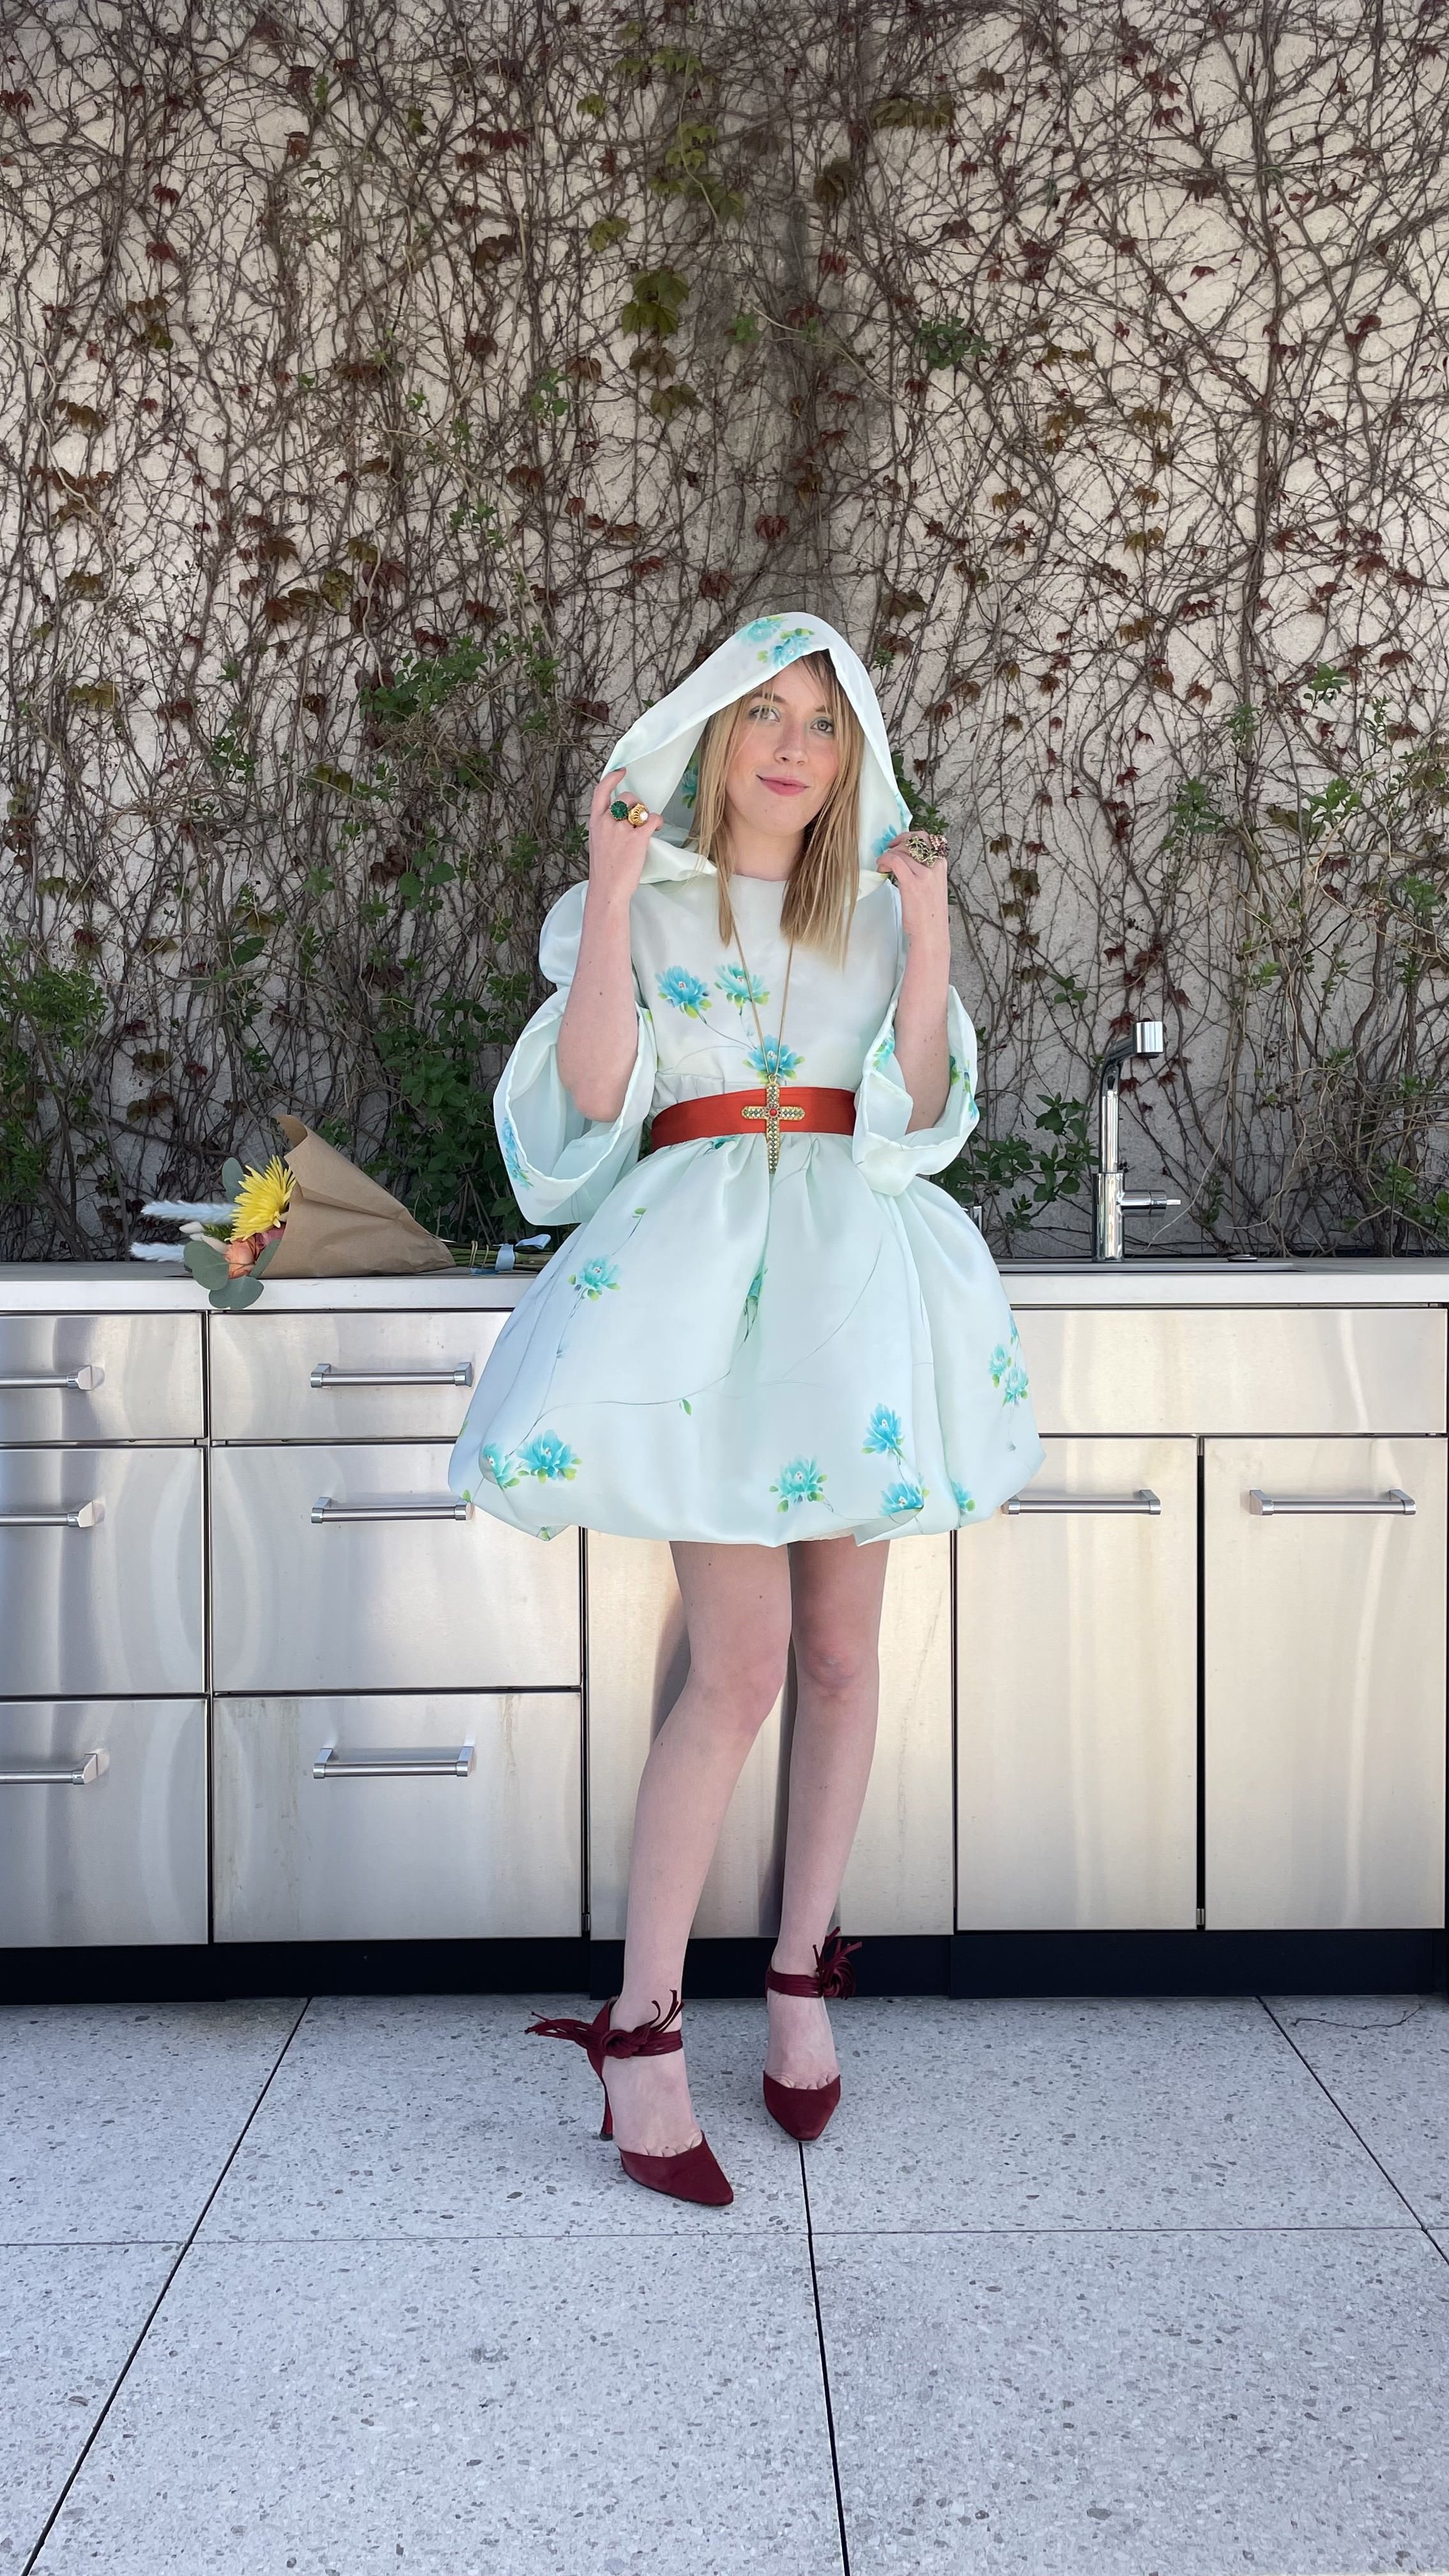
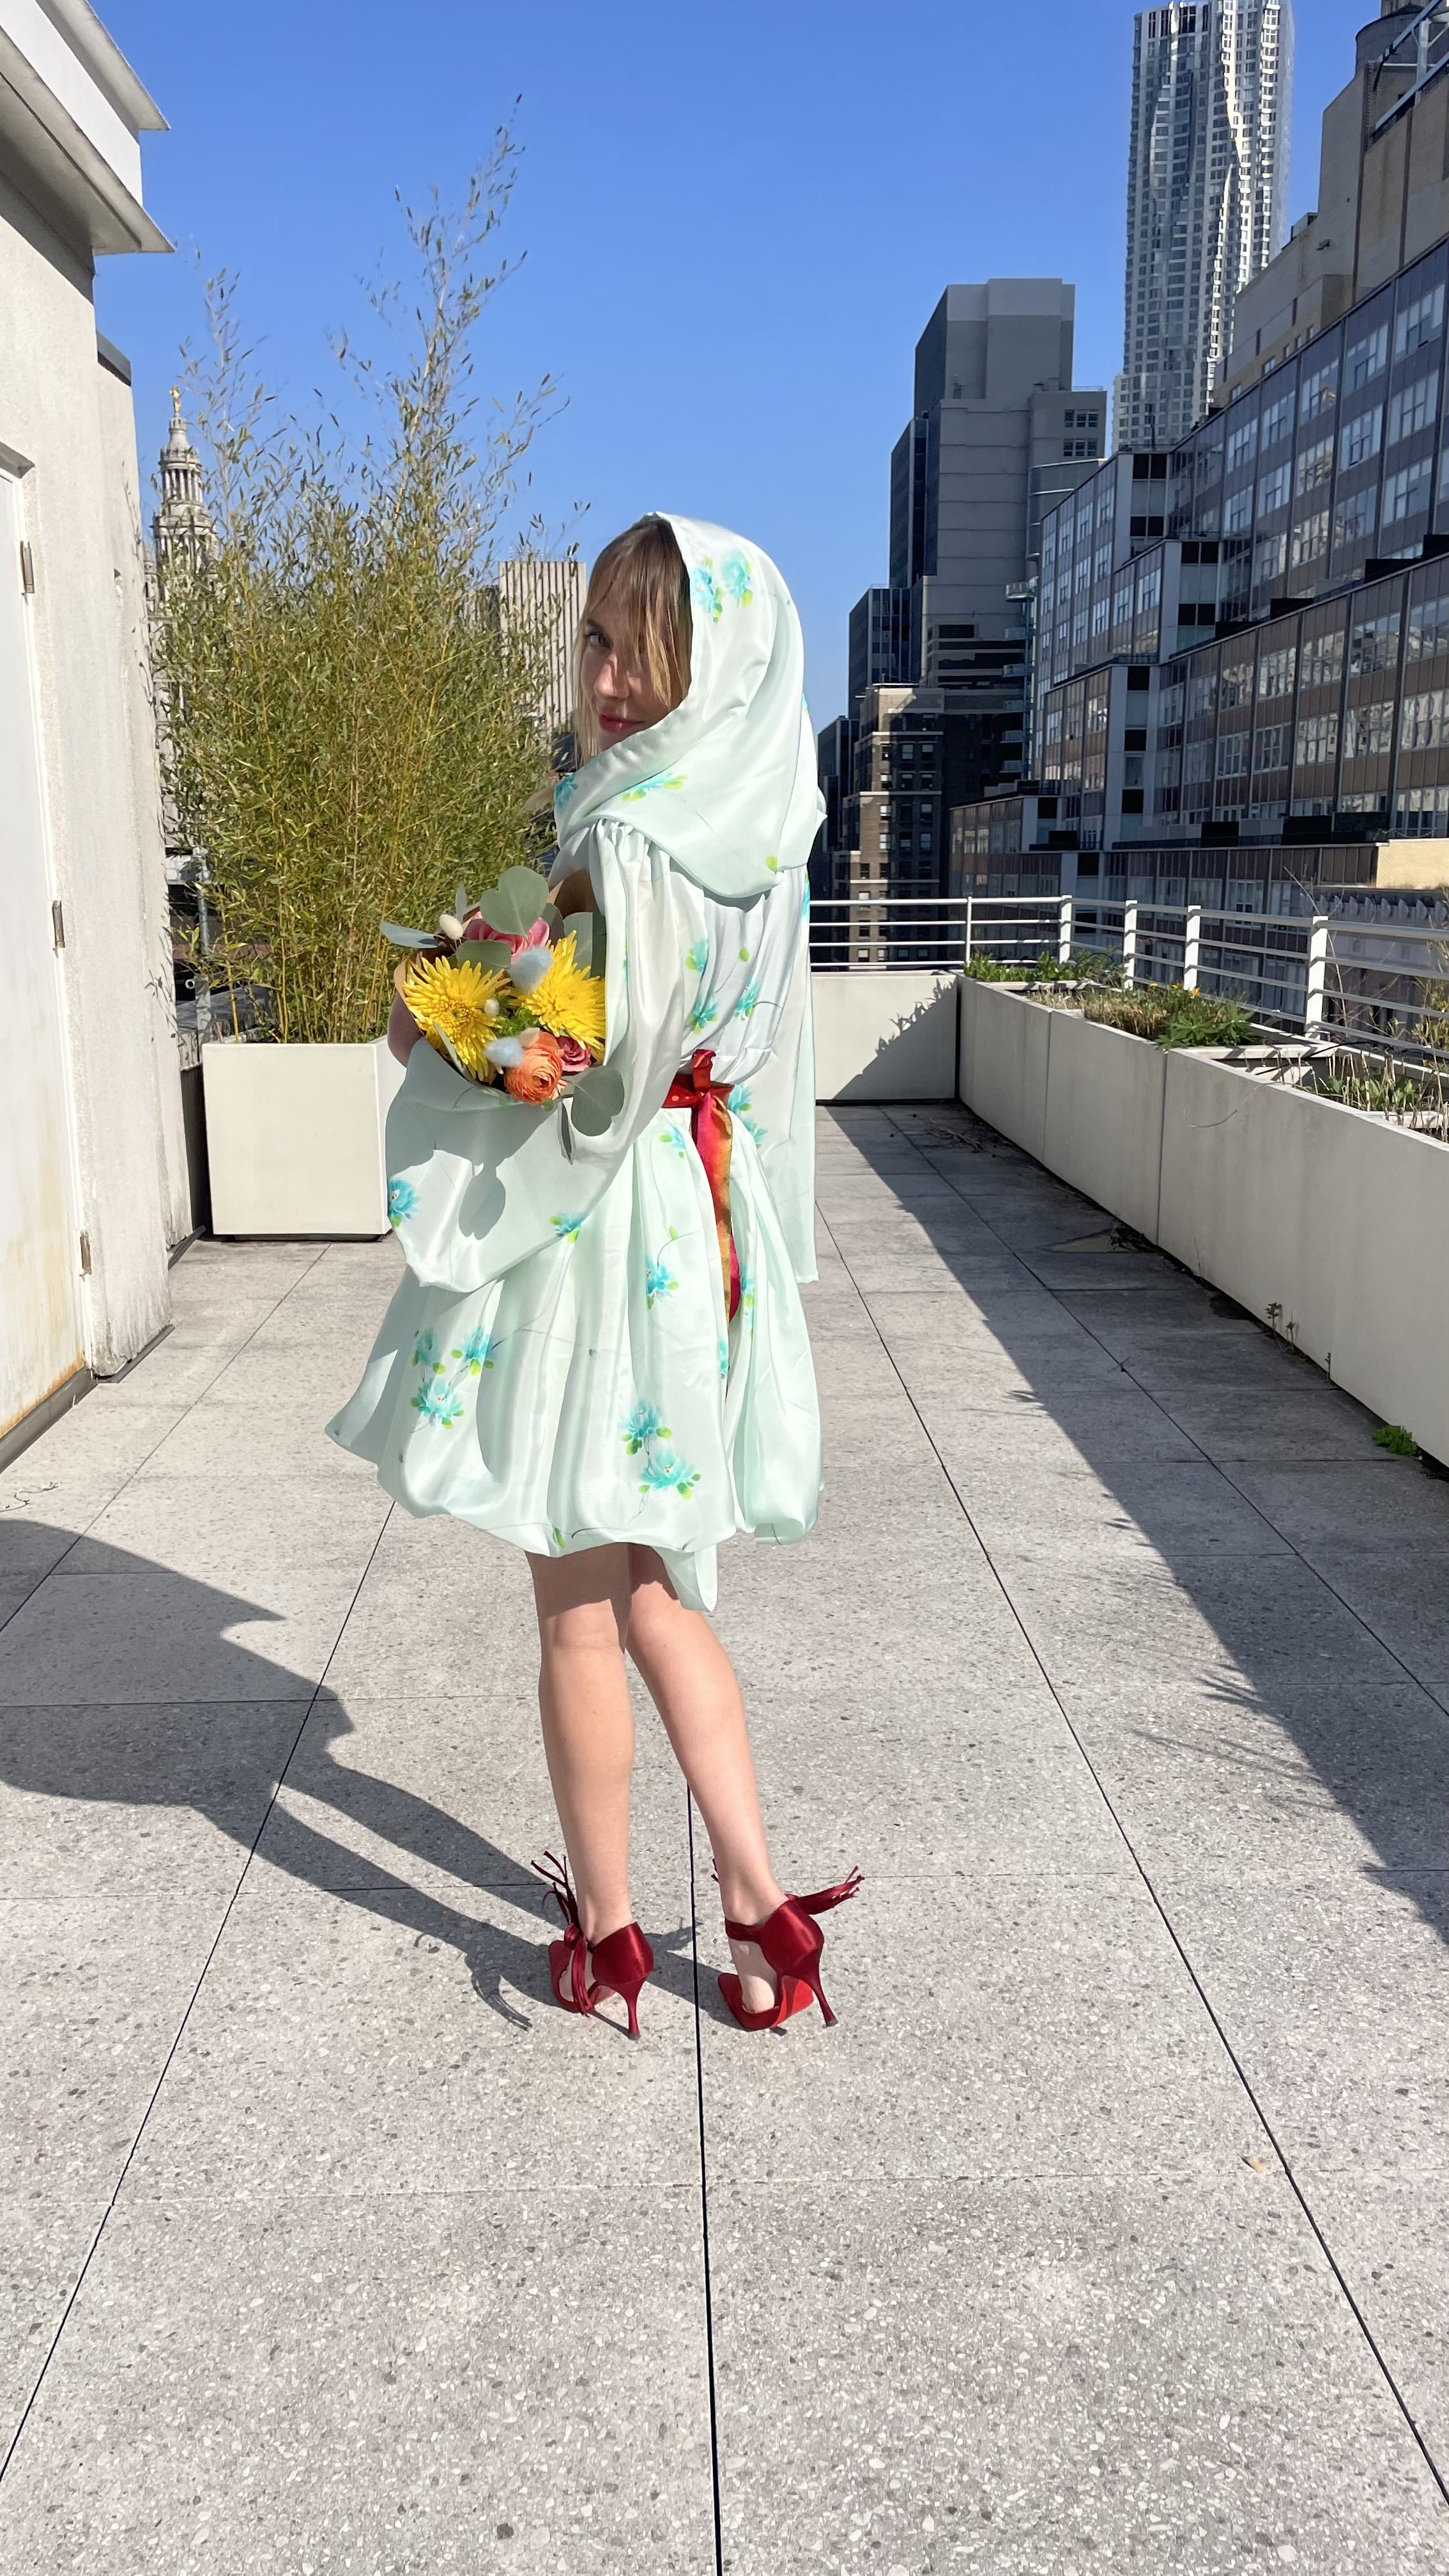
I am so so proud of this dress. It feels like I’m really sewing at a higher level now and completing more major projects. This pattern asks a lot - hand sewing, so much pleating, lining, unusual zipper techniques - but I felt really confident as I did it. And I’m really happy I got to use my grandma’s fabric. It felt special to be connected to her in that way. I wore it with a red silk ribbon as a belt to match my shoes and to pull in the dress - it did end up being a little too big.
Happy Easter :)